Search This Blog

Saturday, December 24, 2016

Chapin HighChest Carving the Shells - Step 18

Since the drawers are made, it is time to carve the shells that are on the front of the two center drawers.
These are not overly challenging but need to be carved carefully. Because of the half circle the grain is changing all the time as you move around to circle.

I took pictures and measured the size of the shells on the original chest when I was at Yale Furniture Study.
BTW anyone can go to the Yale Furniture Study, all you need is an appointment.  If you want to study period furniture it is the place to go. Contact me if you want information on how to set up an appointment.


Full disclosure, I carved a practise one first.  I did a shell like this one 6 years ago but it is always good to do a warm up.


Using the information that I have I laid out the shell on the drawer front.  I used a compass, dividers and circle template for the layout. I fastened the drawer front to a board using double back tape.


First step in carving was to hollow out the recesses. I used a 1 inch #5 gouge on the large recess.


Checking the depth with a cardboard template.  It should be a consistent 1/4 inch deep all the way around.


The second recess is judged by the depth of the small circle for the knob, it should be about a 1/4 inch deep. Then I rounded over the mound. 

I use the nail as a guide to retrace the lines for the rays.


I am using a v chisel to start the grooves between the rays.  Trying to keep them very straight 


Working back and forth to follow the grain on each side of the groove I am using  #5 gouges of various sizes to round over and deepen the rays.


You have to be very careful when you get to the middle because the grain is straight across and will chip out very easily.


Finished carving all the rays and rounded over the center circle. If you chip out a small piece while carving you can use super glue to put the piece back in.


Cleaned up the bumps with a file and sand paper.


All done with the two shells.  They look good on the chest.


Next step is to carve the cartouche.

Here is today's video:

Monday, December 12, 2016

Chapin HighChest Making the Drawers - Step 17

I have finally decided it is time to start on the 11 drawers that I have to make for the chest.  Two of them need to be carved with a shell.

This is a half-size drawing of the chest, the top center and lower center drawer are the ones that have to be carved.


I wanted the grain to match as good as possible so I tried to get all of the drawers out of one board.
I selected the best board I had for the process. This board is over 10 feet long and 17 inches wide but I couldn't get all of the drawer fronts from this board.  So I opted to get the top drawer fronts from this board.


And the lower drawer fronts from this board. The color and grain should match pretty well since all of the boards came from the same tree.


I milled the stock to 7/8 inches thick and put a 3/16 lip on top and sides of the fronts with a dado set on the table saw.  Then with a router I put a 1/4 inch roundover on the drawer faces.
Below I have fitted the drawer faces to the lower chest.


Now for the upper chest. The grain looks good on all of them.


Now that I have all of the drawer fronts fitted to the openings, I need to mill a lot of pine for the sides and back.  The sides will be 3/8 thick and the backs 1/2.  These are the dimensions of the original chest.

I resawed 4/4 pine for the sides and 5/4 stock for the backs of the drawers.

Makes quite a pile of lumber for all 11 drawers and about a zillion dovetails to cut.


Below is a picture of one of the drawers on the original chest.  I am going to follow this pattern for mine.


Laying out the tails on the sides of the drawers. I keep the top pin, bottom half tail and pin sizes the same on all the drawers but I very the size of the tails to evenly fit on each drawer size.


Saw on the line with my dovetail saw. There is a line made with a marking gage on the depth so I know where to stop which is 1/2 inch.


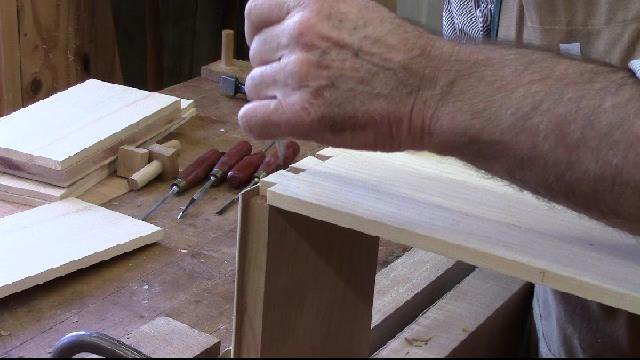
Then I chop out the waste with a bench chisel. These are half round chisels from Ashley Iles.  My favorite for chopping small dovetails.


Now I match the tails to the sides of the drawer front  and mark them out  with a fine pencil.


Sawing out the pins is a little more difficult, since there is a lip on the drawer and they are half blind you can not saw through the board.   You have to tilt the saw at a steep angle and saw down into the drawer front.  This is normal and can be seen on all hand made dovetails in the 18th century. 
I always saw on the waste side of the line and leave the line on the board.


After chopping out the waste like the tails boards, I can fit the sides to the front. If I do it careful they should fit right in.


Good snug fit.


Now to assemble the drawer. Too tall to assemble on the bench, I am tapping them together with a deadblow hammer.


All of the drawer sides and backs are made.  Now I have to mill a lot of pine to about 1/2 inch for the drawer bottoms.  I need to put a groove on the inside of the drawers so I can slip in the bottoms in and glue them up.  Final fitting will be done after they are glued up.


You may notice that I finally got around to gluing the lattice to the goose neck molding in this picture. 
So now I am going to  work on the bottoms and then the carving on to 2 drawer fronts.

Here is today's video:

Thursday, December 1, 2016

Chapin HighChest Turning the Finials & Plinth - Step 16

I used the correct word in the title Plinth but I like pedestal better. I use the words interchangeable.
Anyway the piece I am talking about is in the center of this picture.  This is a picture of the chest at Winterthur.  There are a number of different designs on the various Chapin chests in other museums.
I am trying to reproduce the Winterthur version of the chest as close as possible.  The center piece is made in two parts.  The base and capital are two pieces.  I need to glue up stock to turn both pieces on the lathe.

 
While I am turning things I thought I would make the finials as well.  


I glued up two pieces of 8/4 cherry stock for the pedestal and capital.  The maximum I could make would be 4 inches round.   But the actual size is about 3 1/2.


I made a copy of the finial from the full size drawing that I have.  It is 1 3/4 inches at it's largest and about 6 inches long.  I don't need to glue up stock to turn this piece.  Since I am waiting for the glue to dry on the other pieces, I am going to start with the finials.


After a little warm up on turning I turned the first one below.  I had made two prior during the warm up that I won't show, that's why it is called the warm up.


Now the trick is to make another like this one. I used the first one as a model and turned the stock as best I could.  I am not a good turner so I go slow and try to be careful not to get a catch.


I finally got the slope right and now I am turning the little ball on the top.  Then I put the bead on the center.  A little sanding while it is on the lathe and I think I have two good finials.


I turned the glued up block to 3 1/2 inches round to get ready to add the flutes or round overs.  I have used this box before for putting flutes in quarter columns.  I had to modify it slightly by adding 3/4 of an inch to the top so the router bit would clear the bottom.  I can lock the drive end of my lathe and then l can fix the turning in the lathe bed so it won't turn, this allows me to use the router to cut the flutes.


I counted the number of flutes on the original to be 12 and at 3/8 of an inch spacing it came out even around the circumference of the stock.  I marked the starting point and 3/8 inch spaces on the bottom of the turning.


Then using the router with a point and round over bit, I was able to make passes with the router after locking in the turning.


This what it looked like after about 5 passes. The flutes are a little pointy but I can round them over later.


I routed both sides of the cylinder, so I have 2 of the pedestals that I need. I split them apart where the craft paper is in the center. I cleaned up the flutes with a little sand paper.


 I cut it to length, and check to see how it fit on the top of the case.


I turned two capitals for the top of the pedestal the same way, then split them apart and sawed off the portion that I needed.


I placed the capital on the column in the center and drilled two small blocks of wood to hold the finials.  Here we see the pieces in place on the top of the chest.  None are these pieces are fastened in place.  I am going to wait until I am finished with the drawers before finishing the top.


I am done with this phase of the top, I am going to carve the cartouche last. Now I am going to get started on the drawers.

Here is today's video: 

Wednesday, November 23, 2016

Chapin HighChest Making the Lattice Fretwork Step 15

I completed the gooseneck moldings and mounted them to the top of the case. The original chest used only one screw countersunk on the top of the molding to secure each of them in place.  I followed that method and hope that the fretwork will help add some strength.


The gooseneck moldings came out well using the method I described in the previous two blog posts. Lots of carving.


I have a full sized picture of the molding and fretwork from the original Chapin chest, so I was able to copy the pattern.


I milled a piece of cherry 10 1/4 by 32 3/4 inches to cover the entire area of the lattice fretwork.
Then resawed it to 3/8 of an inch thick. I mounted it in the rebate that is behind the gooseneck moldings so I could trace the pattern on the stock.


Now I could trace the lattice fretwork pattern on to the board from the photograph.


Using the bandsaw I cut out the pattern around the outside of the gooseneck molding and leaving room for the pedestal in the center of the fretwork.
Then I drilled holes in each of the squares so I could put a scroll saw blade through and cut out the waste from each square.


I used my scroll saw to start to cut out the squares but it proved to be too slow.  Each time I switched squares I had to raise the blade, move to a new square and then refasten the blade under the table.


So I tried a jig saw or saber saw, I used it free hand and that worked ok but it was cutting on the up stroke and leaving rough edges on the squares.
I used this box with the jig saw mounted under the surface before for another project, only the blade fit through the top. I thought I would give it a try.


This allowed me to easily place the squares on the sawblade and maneuver the piece to cut out the waste in the squares. It also cut on the downstroke so the tearout was on the bottom or back of the lattice.


All cut out, now all I have to do is clean up the squares with my small rasps


Need to carve the intersection of each square so that it looks like a basket weave, this is not difficult just tedious.

Clamped in place for the time being, I need to make the pedestal and cap in the center and then decide whether to glue it or screw it together.


Here is today's video: