Search This Blog

Saturday, July 28, 2018

Pennsylvania Chippendale Slant Front Desk - Capitals & Case Glue up Step 4

I need to work on shaping the corners of the desk with the capitals attached.  I saved the cut off from the front of each of the sides.  These I used to make two of the four columns in the glue up.  This was I hoped a good way to match the grain.


This is a sample one that I made for practise.  I need to put this joint on the side of the column.


I traced the line on the side from the writing surface board.


I forgot to film it as I was making it.  But first I used a table saw to cut away 7/16 from the side without getting too close to the lip on the bottom.


Then I used a hand saw to cut the 45 on the inside stopping before I hit the side.


Then I cut the flat with a hand saw again stopping before I cut into the joint.


Then I chopped out the waste with a chisel. It is not real pretty in the inside but it is not seen.


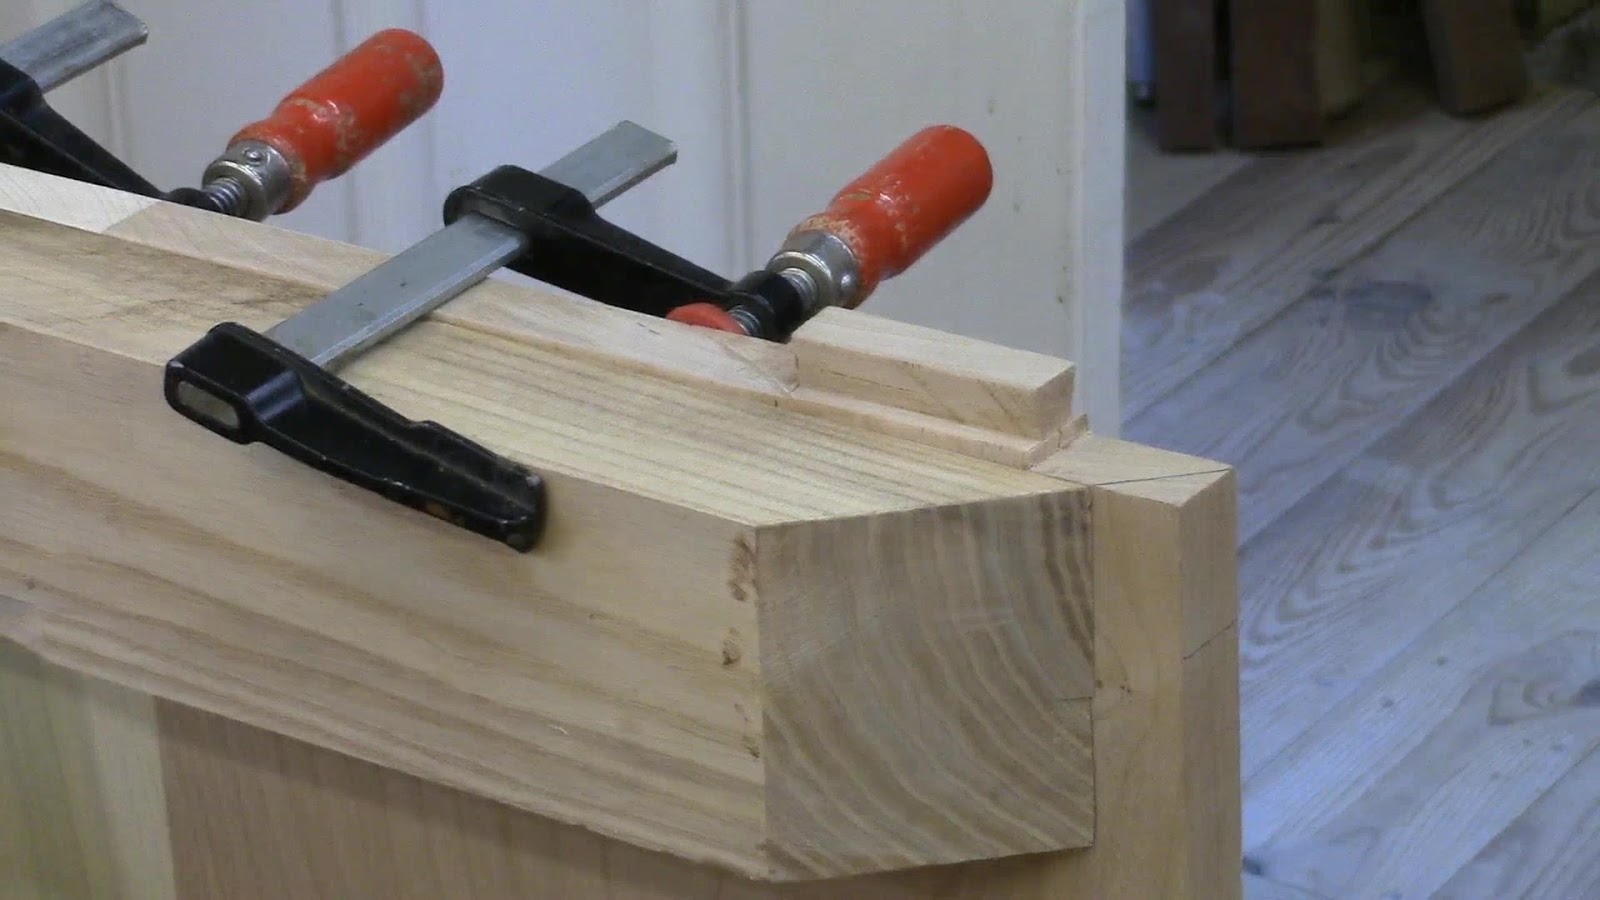
Now to test the fit with the finished piece.


Looks pretty good. I did a little paring on the inside.


Next I created dividers for the lopers and center drawer. I mortised these in to the underside of the writing surface and the first drawer runner.


I created the dividers using the dado set leaving 1/2 inch by 3/8 inch stub tenons.


I use a straight edge to trace the line for the slop of the front. I made the cut on my radial arm saw. I clamped the two sides together and made one cut for both sides. Here I am extending the slope to the corner for the cut off.


The top needs to be trimmed also so I trace the line on the side while it was assembled.


 It requires two cuts, the second line is perpendicular to the first slope line.  This is where the desk lid will be locked.


 When you make the cuts, you should stand the board on edge and tilt the saw blade to the correct angle and cut the perpendicular line first.  Then for the second cut lay the board flat and cut the slop line.
No need to change the blade slope since the cuts are perpendicular.


All set to glue up.


Next i'll work on the lid supports or lopers.

Here is today's video:

Wednesday, July 18, 2018

Pennsylvania Chippendale Slant Front Desk - Making Fluted Quarter Columns - Step 3

I am turning my attention to making the fluted quarter columns for the desk.  I need to do this because the top or capital of the quarter column runs into the slope of the desk lid.  I can't cut the slope until I make the quarter columns.

Here is a picture of the capital turned on a practice piece with one that has been cut to the slope below it on the table.


I used the cut offs from the sides of the desk to help match the grain, I added a 7/16 inch strip to make the 1 1/4 inch square stock.  I have not done this before so we will see how it works out.  If not I have two on the other side.


I prepare the stock by gluing up four pieces of 1 1/4 inch cherry and placing craft paper between the joints.  I use hide glue to hold it together.


Now I have turn the base and capitals. I start by turning a square edge pummel and then turn the end round.  Then I lay out the pattern and turn the shapes.


The design is not too complicated. Cove and bead with a few flats. Need to check the diameter from time to time.


Turned the capital on this end, now I need to turn the base on the other.


I will look something like this once I get the fluted quarter column made.


I have used this box on top of the lathe a number of times in earlier posts for fluting the glued up column.  At this point I have turned the column round and to the diameter that I want.


Then I use my router with a 3/16 inch straight bit to make the flute.  I have marked the edges of the cylinder where I want the flutes so they come out even.


Here is one quarter of the cylinder completed with the router.  I will later finish the flutes with a scratch stock.


This is a scratch stock I have used before to make the flutes in quarter columns. It rounds the bottom of the flutes.


Here are all three together. I have only split apart the top capital.


The quarter columns will need to be cut to length  but I'll do that later when I install them.


The capital has a special joint that needs to fit under the writing surface. I will show how I made this in the next post and video.  You can see the line above the joint near my thumb where it will be cut as part of the slant front.


Here is today's video:

Friday, July 13, 2018

Pennsylvania Chippendale Slant Front Desk - Making the Case Step 2

Now that I have the plans and built the prototype, it is time to get started on the actual piece.
I have some cherry stock from Irion Lumber left over from building the Chapin highboy a couple of years ago.  I am going to use poplar as a secondary wood for the desk.

I start by flattening the boards with hand planes since I do not have a jointer wider than 8 inches.  These boards are 13 inches wide.  I am going to need to glue them up because I need 19 1/2 inches for the sides.

After I get one side flat I can flatten the other side by running it through the planner or drum sander.


Here is the poplar bottom glued up and the cherry top is sitting on the saw top.


Here are the two sides getting glued up.  I use the weights to help keep things flat until the glue dries.
I use the wax paper on the board so the metal on the weights doesn't leave stains on the wood.


Next,  lots of dovetails to cut. The size of the dovetails doesn't matter too much, these are 1 3/4 inch tails and 1/4 inch pins.  They are on the bottom and not seen.


Once the dovetails are cut I layout the dados for the drawer dividers and writing surface using my story stick.


I have the top, bottom and two sides dovetailed so I do a dry fit to see that everything goes together.


I cut the dados and dovetail sockets in the sides using a router with a guide and the dovetails on the end of the drawer dividers using a dovetail bit and the router table.


I have to cut out the  1 1/4 inch from the corners plus 13/16 for a vertical divider to allow for the quarter columns that I want to put in this piece.


I dry fit all of the drawer dividers and writing surface, you can see the open corners for the quarter columns.


Now I have to put a 45 degree miter on the under side of the writing surface to allow the vertical divider a mitered fit.


I use a guide block to help cut the 45 degree miter on the front edge.


The vertical divider need to have a matching 45 on it as well, so I use the guide block to help with this cut.


Dry fitting the vertical divider, hope is doesn't need too much adjustment.


Looks like a good fit for now.


I'll put screws and glue to hold it in place when I do the glue up of the case. The quarter column will be glued in this space also.


Next I will make the top of the quarter column and the extension to fill the area above the writing surface before I cut the slope for the desk front.  That is will be in the next post.

Here is today's video: