Search This Blog

Wednesday, February 26, 2020

Queen Anne Side Chair Finishing the chair - Step 4


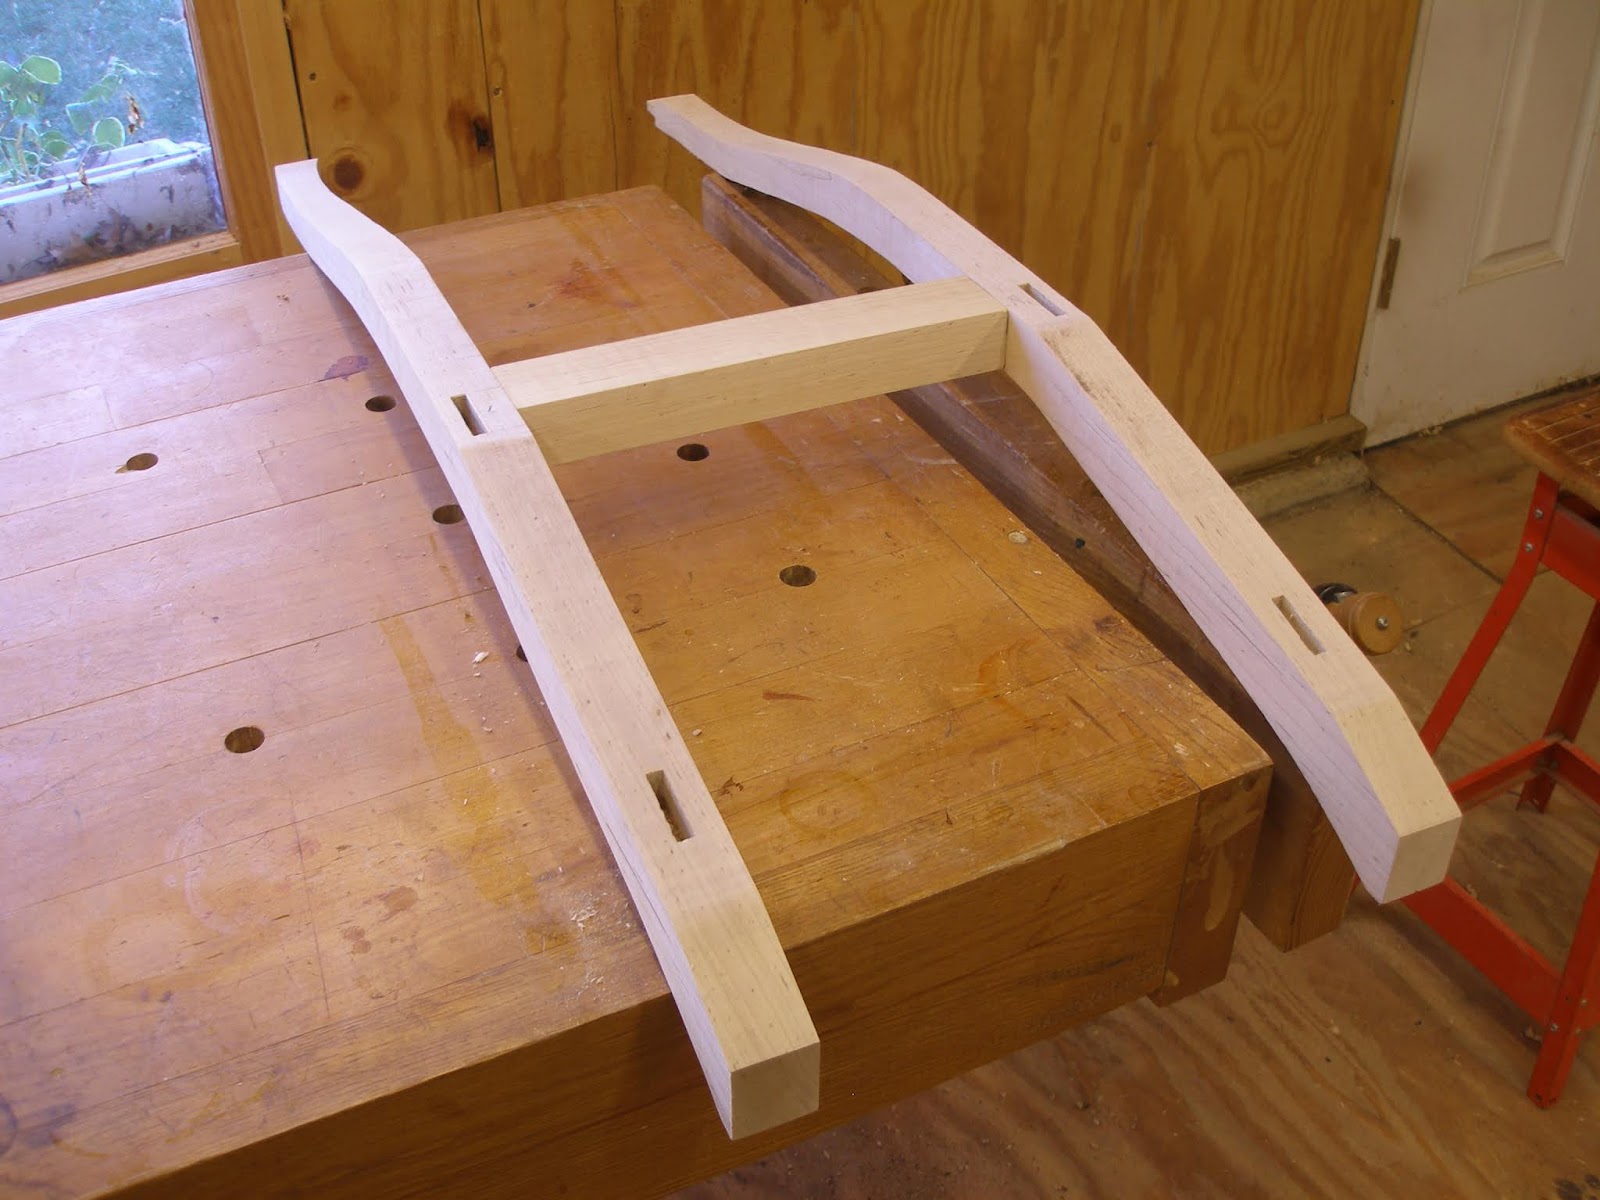
 Finally ready to glue up the chair.  I used Old Brown Glue hide glue,  because it is repairable.

You can see the knee blocks laying on the bench to the left of the front leg.  These were cut out on a bandsaw and will be glued in and shaped ounce the chair has dried. They are used to transition the legs to the seat rails.


Knee blocks have been glued on and shaped to the knees and rails.. Final fitting and sanding is yet to be completed.


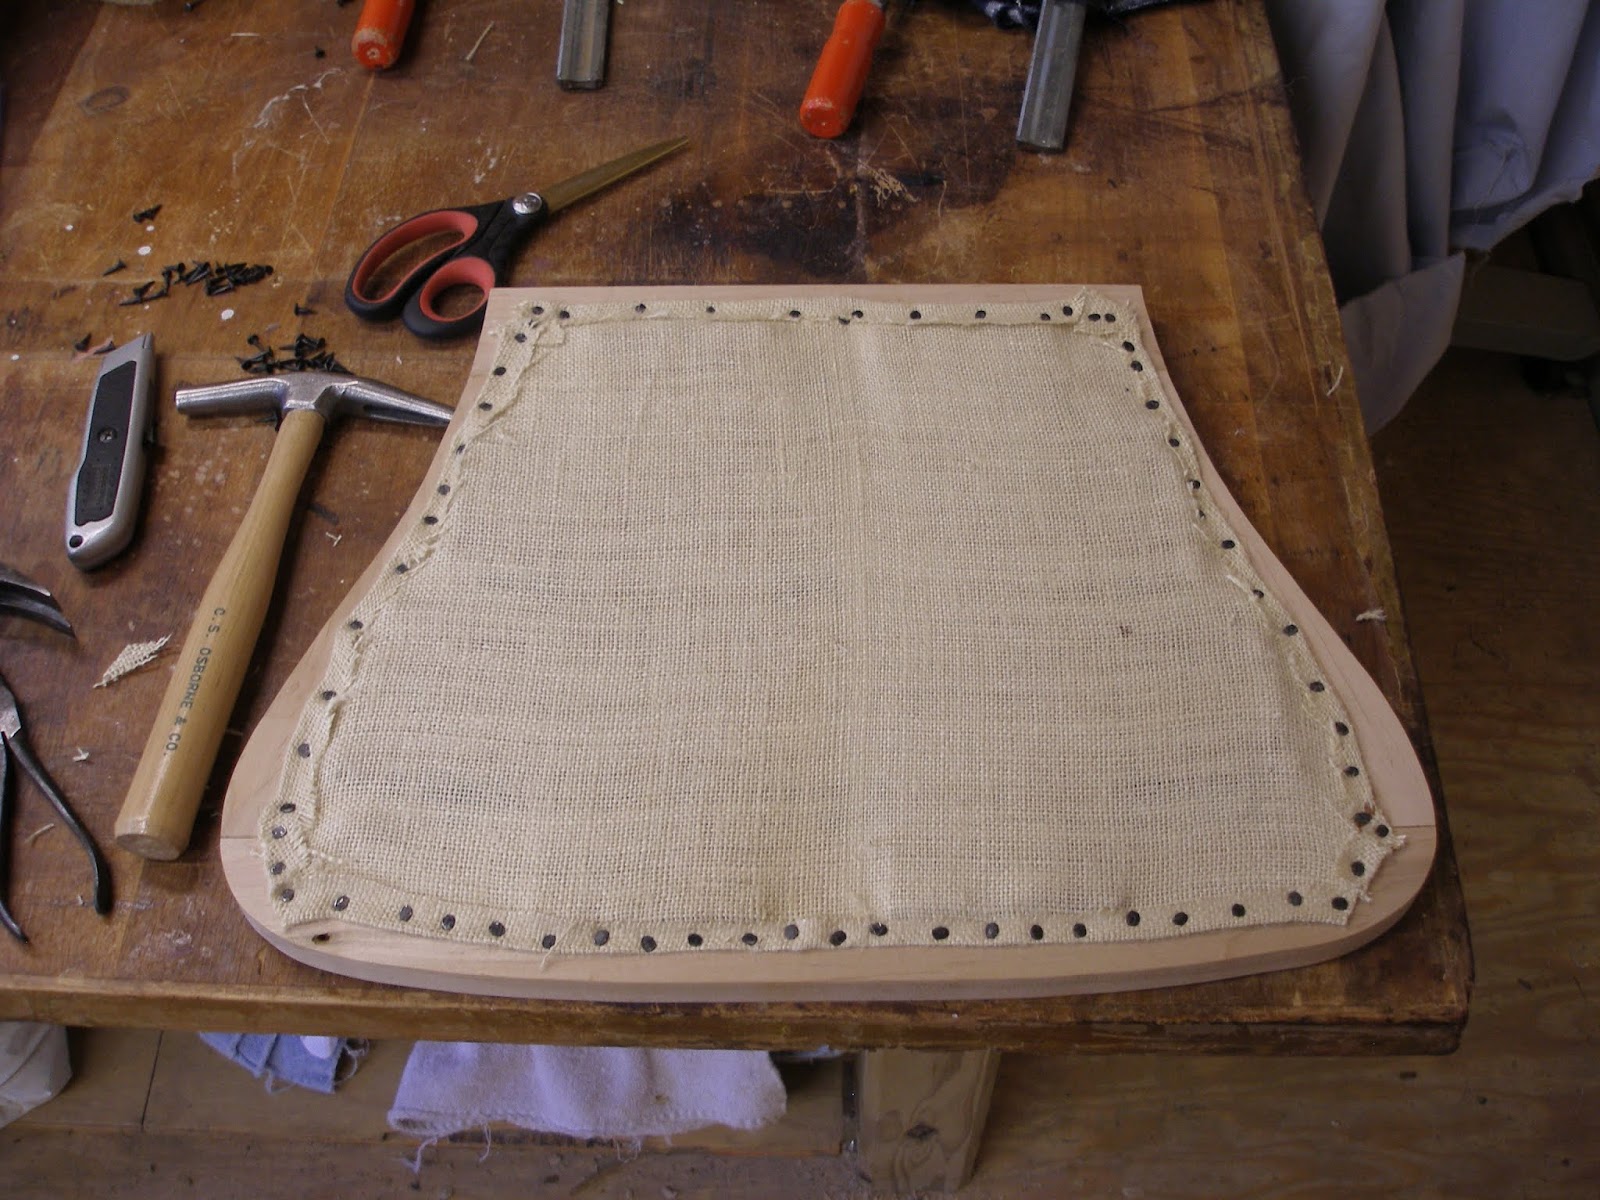
 We now need a seat for the chair.  The style is a drop in seat.  I made a frame out of soft maple 3/4 thick. I used bridle joints on the corners and a cardboard template which matched the shape of the seat. I left about 3/32 inches for room around the frame for the cloth.


I sanded the chair to 180 grit then wet the chair with water to raise the grain.  Then sanded it off with 220 grit prior to applying the dye.  I used a Transtint water based dye "Honey Amber" to darken the maple.  Then is sprayed 5 coats of 2 lb cut blond shellac.


I upholstered the seat my self.  There is a good video on the WoodWright's Shop Season 26     Episode 11 on "Upholstering your seat".  

The webbing goes on first as you can see, I purchased almost all of this from a local upholstery store.


Then the coarse bottom linen.  Fold over the edges for strength.


Then animal hair for filling which would have been used in the 18th century.  I ordered this on-line. It is not horse hair which was expensive. The need to be about 12 inches high.


It is mostly air, so the top linen pushes it down to a comfortable thickness.


Now cotton padding.


Then the finished fabric is tacked on.


All stretched and ready to go.  Hope it fits.


Lastly, I added underlining which would not have been used in the 18th century but I thought it would look better.


And here we are all done. The seat fit nice and snug in the opening.


Wednesday, February 12, 2020

Queen Anne Side Chair - Step 3


The tenons for the crest rail were cut with a hand saw at the time the rear leg where cut out. 


 I made a wooden template out of 1/4 inch pine for the crest rail, this was to accurately scribe and mortise the template so I could transfer the mortise positions to the underside of the crest rail stock     
                                
With a piece of 8/4 stock I mortised the underside and traced the pattern on the face of the crest rail.
 

I cut out the shape with the bandsaw and completed the shaping with rasps, files and spokeshave.


The chair is beginning to take shape. Still a lot of shaping to do.


In the previous picture you can see the lines on the inside of the seat opening.  There needs to be a rebate of 3/4 inch deep on the inside for the slip or drop-in seat. I made a template of the shape and taped it to the top of the rails, then I used a router and straight bit with a bearing at the top in multiple passes to create the rebate.

Below you can see the rebate on the side and front of the seat rail and that there is none on the rear seat rail . 

Also, I have cut out the corners of the cabriolet legs and rounded them over to match the shape of the compass seat. This I did with a hand saw to take a chunk off the block and then rasps and files to shape them.


 Now I turned my attention to the back splat. I cut out the shoe on the bandsaw. The cove on the front was made with couple of core box bits on the router table.

The splat is not going to be glued in, so it needs to fit exactly into the mortise in the shoe and under the crest rail. Again I made a 1/4 inch pine template of the shape which follows the curved shape of the stiles. I transferred it to the side of an 8/4 piece of maple and cut it out on the band saw. The splat is 1/2 inch thick. I cleaned up the front and back side of the curved piece with a spokeshave.

The tenons on the splat where 1/4 inch thick. I used a #78 fillister plane to create the 3/8 x 1/4 inch tenons. Because of the shape of the splat the tenons are on opposite sides of the splat.

After getting it to fit in the two mortises, I traced the pattern on to the splat and cut it out with the bandsaw.  I had saved the cutoff from the bottom side of the 8/4 so the splat set flat on the bandsaw table while cutting it out.


To make the splat look thinner, a chamfer is cut along the edges leaving a 1/8 inch flat.  I used a spokeshave, rasp and files to accomplish this.


Next glue up


Saturday, February 8, 2020

Queen Anne Side Chair - Step 2

The cabriolet legs are the next step.  The are made from 12/4 stock. The queen anne style is to have pad feet which are turned on a lathe.  I turn the pad before cutting out the shape, others do it after.
Cutting the mortises when the stock is square is much easier.


Fitting all of the basic mortises while the stock is still square.


In the photo below the front legs have been cut to shape on the bandsaw, but not yet refined.  The back of the front legs should be refined before you fit the stretchers. The fronts can wait till later.


Getting the angle and length of the stretchers correct is one of the more difficult tasks. I cut these on the table saw and pare them with a chisel.


There are rectangular mortises in the front leg as well as the back leg for the side stretchers.  There are round mortises for the front and rear stretchers.  The rear mortises are straight in but the front are angled as you can see.  I used a sliding bevel to set the angle on a drill press and drilled the holes.


This chair has a compass seat shape.  I used a cardboard template from the drawings that I had enlarged to full size and then traced the pattern on the chair. I cut out the shapes on the bandsaw.


I used a spokeshave to clean up the saw marks and fit them to the shape. The inside area with be rebated to allow for the drop in seat.


Next I'll work on the crest rail.


Thursday, February 6, 2020

New Old Project - Queen Anne Side Chair

Well it has been a long time since I have posted here.  I have been on vacation to Europe and then we bought a new house and sold our old one.  I have now downsized my shop to a single car garage shop.  I am doing a lot of honey do's around the new house, so I am not building furniture at the moment.

I thought I would post an old build that I did about 10 years ago.  A Queen Anne side chair that I found in Norman Vandal's book Queen Anne Furniture.  It was the first chair that I had built.


I  had some curly maple left over from the desk on frame that I had built and my wife wanted a chair to go with the desk. This seemed like a perfect fit.
Norman's drawings and description in the book looked like it was very detailed and complete.
The first thing that I did was blow up his drawings to full size and make full size templates out of cardboard. You can see his drawings and the card board templates that I made from them.


I started by turning the stretchers for the bottom of the chair.  I made more than one since I am not a good turner and would have a choice of which one was better.


Then I turned the side stretchers which were a little more complicated but again I made extra because I had to cut a tenon on the end of the stretcher and it was angled.

You can see that I was sampling some water based dye to test for the color of the final chair.
I hogged out the angled tenon on the stretcher on the table saw an finished it with a chisel.


Using the full size templates I cut out the rear legs and mortised them in the appropriate places based on the drawings.  The tenons on the top of the rear legs were cut with a hand saw but these could be cut on a radial arm saw.  The rear seat rail is cut and tenoned on a table saw and fitted to the mortises.
The legs will be shaped later with a rasp and spokeshave.


In the beginning all I am trying to do is fit all the pieces together.


Roughing out the side rails and the front rail.  Notice that the tenons are angled on these pieces. Which means that the mortises are straight in.  Since this was my first chair I followed Norman's directions.  I think he wrote the article so it would be easier to build.  Today I would make the tenons straight and the mortises angled,  this would produce a much stronger joint.  The material is 2 inches thick because we are going to cut out a compass seat later. The tenons and the face of the rails were cut on a table saw to the appropriate angles.


Side rails fitted to the chair. You can see how the tenons cut at an angle like they are,  might not be the strongest point in the joinery.


Next I will work on the cabriolet legs in the front of the chair, that will be in the next post.