At this point I have applied 6 thin coats of Waterlox finish. As you can see the finish puffs around the grain of the mahogany. This is because I did not fill the wood first.
Some woodworkers sand the surface after the 3rd or 4th coat. Since I was applying relatively thin coats and since it is easy to sand through the finish I waited until now to sand.
I wet sand with 400 wet or dry sand paper with an application of the Waterlox. This pretty much levels and fills the finish.
This is how it looks after sanding and rubbing out with 0000 steel wool. Now I will apply another coat of Waterlox.
This is how it looks with half of the top rubbed out with 0000 steel wool.
This is how it looks now. Not completely filled but better. I may sand again or just rub it out with 0000 steel wool and then apply wax. But it will have to sit for awhile.
Well it is the 5th day in the application of the finish coats of Waterlox. I have been careful in applying the finish. I want to make sure the surface is smooth and dust free.
Each day after the previous coat has dried, I rubbed it out with Liberon superfine 0000 steel wool.
This steel wool is finer than the hardware store 0000. I use both types but for this finish I want the Liberon. It comes on a big spool, so I cut off a length, make it into a pad and rub out the surface to an even dull luster. Then I vacuum off the steel wool dust, it does make a mess. Then I wipe down the entire piece with a clean cotton rag.
Now I am read to apply the next coat of Waterlox. I wipe it on with a clean cotton rag. Make sure it is even and no runs. You have to watch the edges, because the finish will pool and get thicker there. It take about an hour to do all the prep and apply the next coat.
Than I close up the shop and let it set for a day, that way it does not get as much dust on it while it is tacky.
I think I could use a clean room, but then I would never get out of the shop
Here is how it looks after 5 coats.
I think it could use another one or two coats. Once I stop applying finish, I will wait a week or more and then sand with 600 grit wet or dry and then apply a paste wax.
Can't wait for it to be finished.
The past few days I have been experimenting with the final finish for the table. I have heard a lot about Tried and True finish but have never "tried" it. It is basically a linseed oil and bees wax mixture. It is fairly easy to apply by following the directions on the can.
You can only put on one coat per day, so it took 3 days for me to get to this point. Waterlox is similar in speed (one per day) but it is quite different in mix. Waterlox has tung oil and linseed oil and other secret ingredients.
Here is a piece of the top with 3 coats of Waterlox on one side and 3 coats of Tried & True on the other.
At this point they look about the same. I will continue to add more coats since I am interested what will happen with the Tried & True. I know what happens with the Waterlox.
Eventually, the Waterlox stops absorbing into the wood and settles on the surface to create a film. I keep sanding with 600 grit to make it smooth and reduce the shine.
I have decided to use the Waterlox because I like a little bit of a shine on my furniture, not like what it looks like if you only use danish oil.
So I rubbed out the dye on the table with white Norton non-woven pad, it is softer than 0000 steel wool and not a messy. This knocked off the nubs and burnished the finish.
Then I applied an average coat of Waterlox ( not thin not thick) with a cotton cloth. Within five minutes it had soaked into the wood.
Here is what it looked like about an hour later.
So tomorrow I'll rub it out and put on the next coat.
Here is today's video:
I have sanded the table by going through the grits 120, 150, 180 and 220. For the frame it was done all by hand. For the top since it is flat I used my orbital sander. I used a vacuum to remove the dust after the last pass.
Sanding around the carving was only done lightly with the 220 sand paper. I don't want to loose the detail.
I am wearing a mask to keep from inhaling all the mahogany dust which irritates me. So I have sanded everything to 220. Now I have to pick a color for the table. I often feel that this process is like alchemy, each wood takes the stain or dye differently. Maybe I should stay with only one type of wood. It has been awhile since I have worked with mahogany. It is an open grain wood so often finishers fill the wood to close the pores. I do not intend on filling this piece. I may sand down each coat of finish which has some filling but not completely.
I have selected my color after trying about six different colors and finishes.
It Lockwood's Honduras Mahogany which has a little brown in it. Here is how it looks after applying the dye.
I did not pre-raise grain. I will rub it out now with steel wool or scotch pads. Making sure the color is even.
Next is to select the top coat. It will be either blond shellac, Waterlox, or Tried and True. I will do some testing next.
Here is today video:
I finally finished chopping out the mortises for the hinges. Very delicate work and all end grain cuts. Now I have to drill pilot holes for the screws. I am using my egg beater drill to put a shallow hole in the end grain.
I position the two halves with one hinge attached and then screw in the other half.
Now comes the test to see if it closes flat and flush.
Looks pretty good. I got the hinges from Horton Brasses. They even included extra screws.
Now to position it on the frame.
The overhang is 3/4 inch on the front and sides and 1/16 inch beyond the rear swinging leg.
I am fastening the top using the table buttons. I am using 1 1/4 inch 10# screws. About 5/8 inch is going into the top. I pre-drilled the screw hole using a tapered drill.
All Done. Now to take it apart and sand the frame and legs. The top is already at 180. I'll sand the whole table to 220 before I raise the grain.
Here is today's video.
I thought that I would practice cutting the mortise for the table top hinge since I had not installed this type of hinge before. I had the cutoff's from making the table top so I had pieces which were exactly like the top.
I thought about using my router to cut the mortise, but setting up blocks and guides would be a lot of work and I am not sure it would come out any better. I also thought about using my router plane, but I would still have to set up blocks to support the plane. So I decided to just use chisels.
Using my ruler and small square I marked out what I thought were good lines. Since the table edge is rounded I could not just lay it on the side and run a marking knife along the edge.
Here is a shot of the board with the beginning of the mortise. It is all end grain so it is a little difficult to cut out the slot.
I have the first one fitted. It took awhile....
Here it is with both fitted. I did not get the hinge blades straight and the butt of the hinge is not flush with the edge of the top. So the top would not close. Nothing I can do now to improve the fit. I will have to measure more carefully.
It is definitely a do over.
Here is the second attempt. The hinge blades are parallel and the hinge closes correctly and flush.
I really have to be careful when I measure and chop out with the chisels.
I am ready to put the hinges on the top but first I have to sand the top so that it is at the final dimension before I cut the hinge mortise. So tomorrow I will start my favorite part of woodworking. Sanding. NOT....
Here is today's video:
Worked on carving the knee blocks. The first one, I carved after I had glued it on. That was too difficult. So the rest of them, I carved most of it while it was off the leg.
I traced the pattern and then carved it. It is mostly carved when I glued it to the leg. Then I finished carving after it was attached.
Here it is with all of the knee blocks attached. The top is not that much lighter but it is the way the light is hitting it.
Then I started working on the table buttons. I cut some 1/4 inch groves in the inside of the apron. Then milled some 1 3/4 inch by 5/8 inch stock. I need to make a 1/4 inch rabbet on one edge. It is just as easy to use a fillister plane to cut the rabbet as to set up the dado blade on the table saw.
This is how they look when finished.
Tomorrow I will work on the hinge for the two halves of the table. Then I think the construction is complete. I need to start thinking how I want to finish the table. My wife thinks it should be stained a dark reddish brown mahogany. We shall see.....
I completed the table top today using a round over bit in my router table. It is a messy, noisy, dusty machine but it comes in handy from time to time. It made quick work of rounding over the two halves of the table top.
I positioned the top on table and it is sitting flat and the curves match the front. So I am happy the way it turned out.
I have to install the hinge in the two halves yet but I will do that later. I also adjusted the swinging legs a little and they seem to be working ok. As warm and humid as it is right now, I think they will fit even better in the winter when it is dry.
So on to the knee blocks and the last of the carving. I was not happy with the last knee block design that I did, I thought it was too thin. I redesigned them to be much more round.
The old one is in my hand, the new design is on the table leg. Quite a difference.
I glued on two of them so they could dry over night. Tomorrow I will carve them and make the rest and glue them on. I should finish carving the following day.
Here is today's video:
Well I hand planed the mahogany board so I could see all of the grain and imperfections in the board. One end looks good enough for the top half which has to be good both sides.
So I flipped it over and planed the other side to make sure it was ok. Then I worked on the other end of the board. It looks like there is enough for one good side. Each of the boards will be 16 3/4 inches wide by 33 1/2 inches long. I would like them perfect but there are worm holes which I can not avoid.
After I hand planed the ends to reasonable flat, I cut off the 2 ends at 38 inches each. So now I had 2 short board to mill. I used my wide belt sander to finish the two boards.
Here they are back to back in the open position. The grain looks book matched so I am happy with that.
Next I traced the pattern on the boards and cut the pattern out with a jig saw. I wonder what the old guys used. Probably a coping saw.
This is just after sawing. I probably should have clamped them together and cut both at the same time. That would have insured that they would have matched. But since I didn't I will have to shape them together.
There is not a lot of work to do but I could have saved myself some time.
Tomorrow I'll round over the edges.
Here is today's video
Well I glued up the table frame today. I disassembled the swinging legs from the frame and of course disassembled the entire table prior to gluing.
I used Old Brown Glue for the glue up. It is what I have been using for several years now. I use it on everything except edge gluing boards.
First I did the frame and then glued the legs to the swinging apron.
So now I have to wait over night for the glue to cure.
While I am waiting I started to look for material for the two top pieces. These are 16 3/4 inches wide by 33 1/2 inches long. I have a 20" by 9 foot 4/4 mahogany board which I bought to use for the top.
I used a hand plane to remove some of the rough surface on both sides so I could see the grain, color and imperfections in the wood. I did find some discoloration at one end and some worm holes.
The top of half of the table swings open so it has to be good on both sides, the bottom half is fixed so it only has to be good on one side. That makes it a little easier. Still I would like the color and grain to match as best as possible from this piece of wood. Here is a shot of some of the discoloration on one end. I think this could be on the bottom of the fixed portion of the top.
What do you think about the worm holes, should I leave them for character or fill them? Let me know with your comments.
Here is today's video
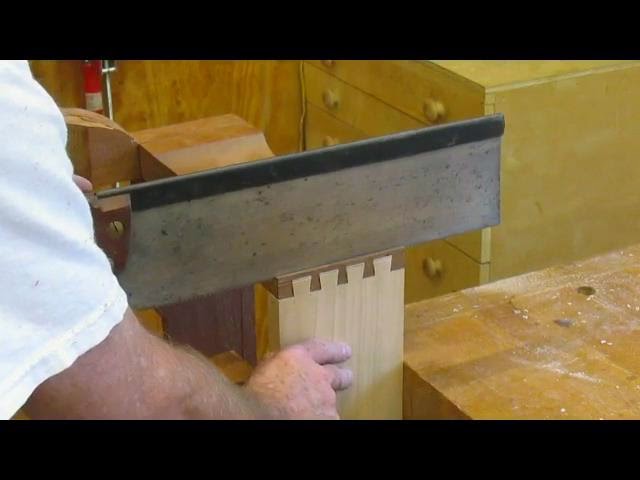
Well I have been working on cutting the tenons on the end of the swinging rear legs. This has to be done very accurately. I have centered the knuckle joint support and attached the 2 swinging aprons. Using the legs to check the dimensions I marked a line where the tenons shoulder should be.
Then I cut the shoulder on the table saw and cut the cheeks with a hand saw. Setting up the table saw to cut the cheeks would take a lot longer than just cutting them with a hand saw.
Once the tenons were fit to the legs, I needed to hog out the area the create the 1/4 inch tenon which fits in the 1/4 in slot on corner of the table. This is required since the rear swinging apron is 1 1/4 and the leg is 1 1/2 inch thick. Then I cut the 1/4 recess on the rear corner of the table.
Then I pared the joint to fit and repeated the process on the other side. Both legs now fit nearly flush with the assembly clamped to the back. So it was time to turn it over and see how well it works.
It stands on it's own and the legs swing pretty well. I have a little fiddling to do yet with one of the legs but it is close. This completes the construction of the table frame. So now I will glue it up and then add the knee blocks.