For the most part it will look like this.

It has quarter columns in the corners, curved bracket feet and oxbow style drawer front. If I can get cherry thick enough I will cut them from one piece, otherwise they will have to be veneer fronts.
The first thing that I did was make full size drawings. This helps me think through all of the construction techniques that I will have to use in the construction. Some of the more challenging steps will be the serpentine molding on the front, curved bracket feet, curved drawer fronts, cockbeading on the drawer blades and the quarter columns.

I was able to get a lot of dimensions from this old book with a chest of drawers similar to the one I am going to build.


From the full size drawings I made templates for the front curve. This can be used for the drawer blades and fronts, also the chest bottom.


I start by flattening 2 poplar boards about 12 inches wide. Once I get one side flat with my hand planes, I then use the planer to flatten the other side. Then I joint the edges so I can glue up the panel.
Below I am checking the edges to see that it is a good tight fit.

For most woodworkers gluing up panels is second nature. When working with solid wood furniture you do it almost every time.

Once the panel is dry, I scrape off the excess and finish milling to the final thickness of 13/16 inches.

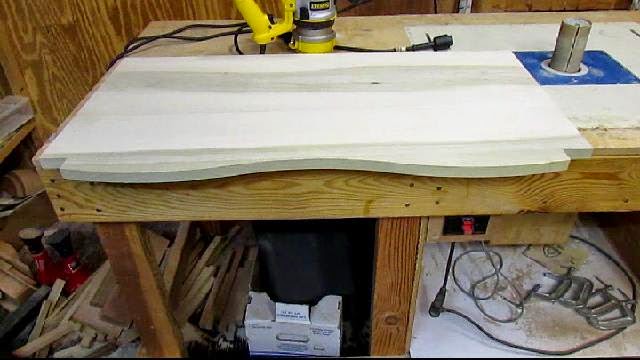
Here is where the template is handy for tracing the pattern on to the chest bottom.
Then I used a jig saw to cut out the pattern, leaving about 1/16 inch extra to trim off.

Then I will use the pattern again to finish trim the edge with a flush trim bit in my router. I makes a nice edge. I could have used an oscillating spindle sander to trim but this is quicker.

There you have it, the bottom is made.
The sides will be dovetailed to the bottom, so I need to go get some good looking cherry lumber.
Tomorrow we are going to take a trip to a new supplier in Middlefield Ohio, about an hour from my shop. He says he has some good 8/4 figured cherry for the drawer fronts. We will soon find out.
Here is a link to the video:
It is a nice looking chest. I tried to enlarge the figures, no luck. I'll stay tuned.
ReplyDeleteBoyce
Thanks Boyce, If there is a particular picture you want let me know.
DeleteThank you, a picture showing the dimensions would be very helpful.
ReplyDeleteBoyce
Cruseomatic@gmail.com
I'll get you something
DeleteLooking forward to seeing this one come together. Gotta get back to Middlefield myself if I ever make something bigger than a breadbox. ;)
ReplyDeleteThey miss your business :)
DeleteDavid,
ReplyDeleteI've been following your blog the last few weeks and have really f
That table and chair are beautiful and I was wondering if you have any information/plans that you could tell me about? As far as building it myself, well I'm not that advanced but one never knows.
Please let me know about that piece if you get a chance.
Thank you very much,
Michael Rogen
Michael, Thank you but I am not sure which one you are asking about. Do you mean the desk and chair picture at the top of my site? Or one of the projects?
DeleteDavid,
DeleteThe desk and chair at the top of your site is the one! I'm sorry for the confusion.ive been admiring it for some time now so if you have any information/plans I'd be greatfull.
Thanks again,
Michael
I drew the plans. I'll have to look for them. Send me your email to dboeff@sbcglobal.net
Delete