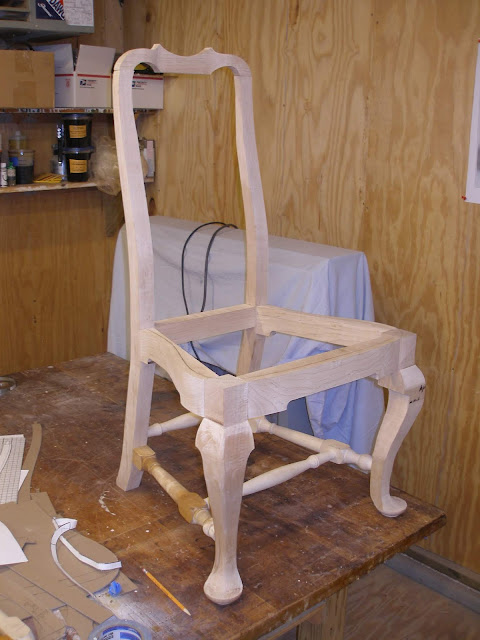
The tenons for the crest rail were cut with a hand saw at the time the rear leg where cut out.
I made a wooden template out of 1/4 inch pine for the crest rail, this was to accurately scribe and mortise the template so I could transfer the mortise positions to the underside of the crest rail stock
With a piece of 8/4 stock I mortised the underside and traced the pattern on the face of the crest rail.
I cut out the shape with the bandsaw and completed the shaping with rasps, files and spokeshave.
The chair is beginning to take shape. Still a lot of shaping to do.
In the previous picture you can see the lines on the inside of the seat opening. There needs to be a rebate of 3/4 inch deep on the inside for the slip or drop-in seat. I made a template of the shape and taped it to the top of the rails, then I used a router and straight bit with a bearing at the top in multiple passes to create the rebate.
Below you can see the rebate on the side and front of the seat rail and that there is none on the rear seat rail .
Also, I have cut out the corners of the cabriolet legs and rounded them over to match the shape of the compass seat. This I did with a hand saw to take a chunk off the block and then rasps and files to shape them.
Now I turned my attention to the back splat. I cut out the shoe on the bandsaw. The cove on the front was made with couple of core box bits on the router table.
The splat is not going to be glued in, so it needs to fit exactly into the mortise in the shoe and under the crest rail. Again I made a 1/4 inch pine template of the shape which follows the curved shape of the stiles. I transferred it to the side of an 8/4 piece of maple and cut it out on the band saw. The splat is 1/2 inch thick. I cleaned up the front and back side of the curved piece with a spokeshave.
The tenons on the splat where 1/4 inch thick. I used a #78 fillister plane to create the 3/8 x 1/4 inch tenons. Because of the shape of the splat the tenons are on opposite sides of the splat.
After getting it to fit in the two mortises, I traced the pattern on to the splat and cut it out with the bandsaw. I had saved the cutoff from the bottom side of the 8/4 so the splat set flat on the bandsaw table while cutting it out.
To make the splat look thinner, a chamfer is cut along the edges leaving a 1/8 inch flat. I used a spokeshave, rasp and files to accomplish this.
Next glue up


No comments:
Post a Comment