I thought I would post an old build that I did about 10 years ago. A Queen Anne side chair that I found in Norman Vandal's book Queen Anne Furniture. It was the first chair that I had built.

I had some curly maple left over from the desk on frame that I had built and my wife wanted a chair to go with the desk. This seemed like a perfect fit.
Norman's drawings and description in the book looked like it was very detailed and complete.
The first thing that I did was blow up his drawings to full size and make full size templates out of cardboard. You can see his drawings and the card board templates that I made from them.


I started by turning the stretchers for the bottom of the chair. I made more than one since I am not a good turner and would have a choice of which one was better.

Then I turned the side stretchers which were a little more complicated but again I made extra because I had to cut a tenon on the end of the stretcher and it was angled.
You can see that I was sampling some water based dye to test for the color of the final chair.
I hogged out the angled tenon on the stretcher on the table saw an finished it with a chisel.

Using the full size templates I cut out the rear legs and mortised them in the appropriate places based on the drawings. The tenons on the top of the rear legs were cut with a hand saw but these could be cut on a radial arm saw. The rear seat rail is cut and tenoned on a table saw and fitted to the mortises.
The legs will be shaped later with a rasp and spokeshave.

In the beginning all I am trying to do is fit all the pieces together.
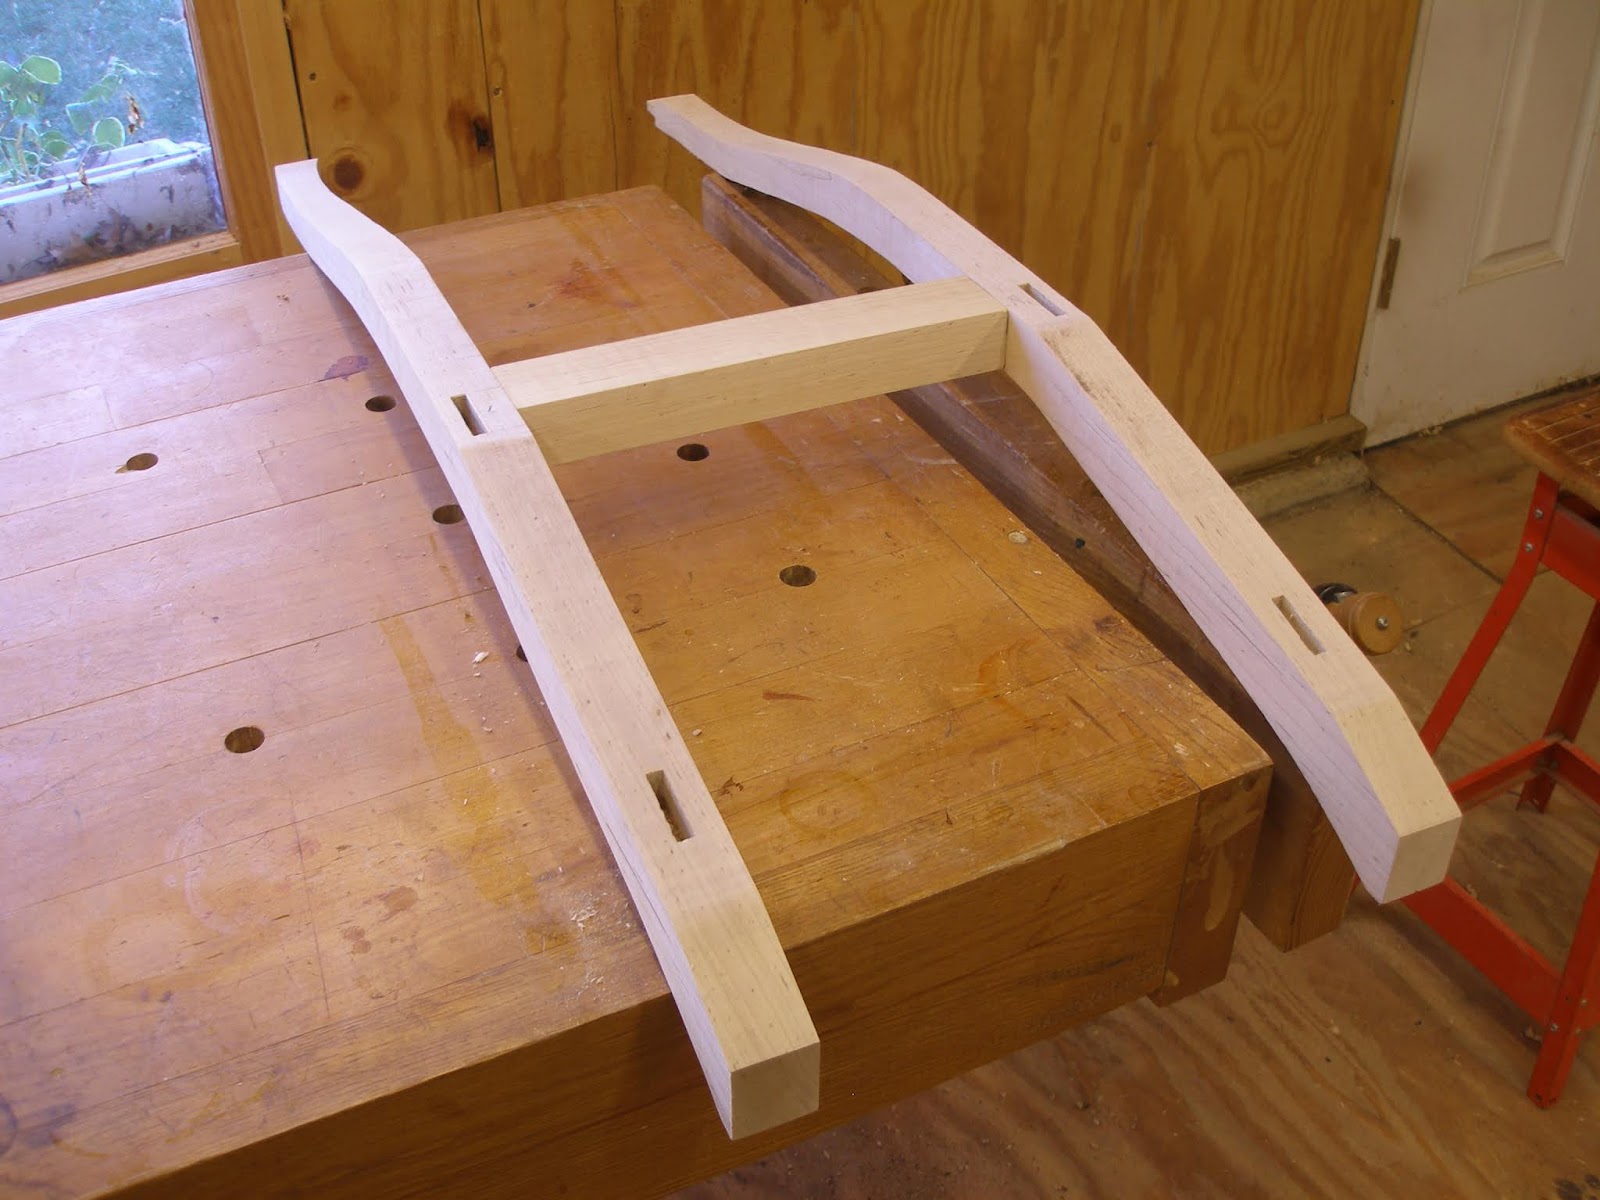
Roughing out the side rails and the front rail. Notice that the tenons are angled on these pieces. Which means that the mortises are straight in. Since this was my first chair I followed Norman's directions. I think he wrote the article so it would be easier to build. Today I would make the tenons straight and the mortises angled, this would produce a much stronger joint. The material is 2 inches thick because we are going to cut out a compass seat later. The tenons and the face of the rails were cut on a table saw to the appropriate angles.

Side rails fitted to the chair. You can see how the tenons cut at an angle like they are, might not be the strongest point in the joinery.

Next I will work on the cabriolet legs in the front of the chair, that will be in the next post.
No comments:
Post a Comment