
This is a link to the video from the prior build where I made the drawer fronts
Curved Blockfront Dressing Table Final Convex Drawer Fronts Step 15
I was satisfied with the preparation I had made, next I needed to select the stock for the drawer fronts.
I have this large 8/4 figured cherry board that should be great for the fronts. I want the grain to match and there to be interesting figure.

I use my hand planes to flatten one side of the board to expose the grain. I select about 30 inches of the board for the stock. I need to plane it to 1 3/4 inches.

I milled six blocks, the grain is continuous and should match the apron.

I mark out the pattern on the top of each of the blocks, I use the top drawer blade as a template and bandsaw out the curves. The bandsaw blade broke on the last one so I finished the cut with an old blade that was dull as you can see it burned the wood.

I use my round bottom spokeshave to clean up the bandsaw marks on the curved fronts.

To finish I use my card scraper to get a better finish.

Now that the fronts are smooth, I use two router set up to put the quarter round on the edges of the fronts.
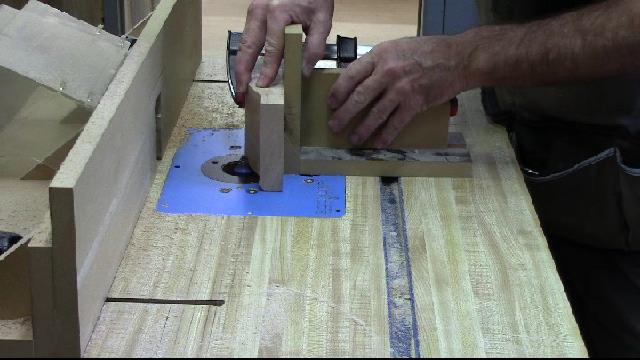

I have to use the above router set up because the corners have been cut by the first pass on the router, if I turn the drawer front on the side and run another pass it will be too deep on the corner. Routing from the top and registering from the back the second cut depth can be perfect.
Next using the router and a template I route out the majority of the 1/4 inch from the top, creating the lip for the drawer.

I use the table saw to cut out the sides to create the lip on the sides of the drawer front. I check the rough fit for each of the drawers.

I left about 1/16 of an inch for final fitting when I routed out the majority of the wood.

I use chisels and small hand plane to clean up the waste left by the router.

I carve away the remaining checking frequently for a good fit.

All six fitted and cleaned up. I love the grain in the fronts.

Now is the time to glue up the case. I drilled the 1/2 inch holes in the bottom of the apron for the drop finials. I sanded the sides and apron to 180.
This is a complex glue up. I use Old Brown Glue liquid hide glue which has a long open time.
I glued the rear legs to the back, then laid it flat on the table. Then I glued the front legs, apron and drawer blades together to make the front. Then I glued the sides and the drawer runners to the back. Everything was sticking straight up off of the table. Then I fit the assembled front to the sides and drawer runners.
Once it was all together I stood it upright and clamped it.

I have to clean up the excess glue and sand a little when it dries.
Next I will work on making the drawers.
No comments:
Post a Comment