I did not want to make a large piece that would take up a lot of room, I want something that could be used as a decorative piece for an entrance hall way.
Below are three of the pictures that I found on the internet. The lower one is too large but I like the design. The upper left is too small and the upper right is just about right to my eye.

What I have done is select design features from each of these pieces. I made a full size drawing of the proposed piece.

Then I made a very rough mock up of the proposed dimensions. I like the height and depth but not the width. So, I am going to make it narrower. It will be in two pieces. A desk on frame construction.

Now that I have a plan and dimensions, I can start. I am going to use some curly (tiger) maple that I have from a previous project. I have just four boards remaining, so I hope I have enough. But this is some beautiful maple. I did not have any 8/4 for the legs, so I purchased a board from Byler's in Middlefield Ohio. I hope it matches the sides.
I start with making the legs. I am going to taper the legs on 2 sides. This is a common way to do tapered legs. Federal Period pieces often have the legs tapered on 4 sides but that would not look good on this piece.
Here is the leg stock milled to 2 inches square. I need to cut it to 32 1/2 inches in length before do the tapers. The apron of the frame is 4 3/4 inches and will have one drawer. So the taper begins below the 4 3/4 inches.
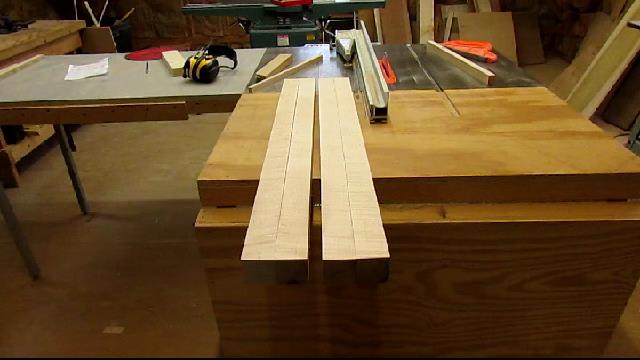
I have a tapering jig for 2 sided tapers I made some years ago. It is just a matter of adjusting the slope and length of the taper for this project. The blade starts it cut 4 3/4 from the top and tapers to 1 1/8 inch at the bottom.

Then I turn it to cut the taper on the adjacent edge. The curly maple is difficult to cut even on a table saw so it leaves quite a bit of burn marks. I will have to plane this off later.

Once the legs are cut, I milled some 3/4 inch stock to 4 3/4 inch wide and put a 1 inch tenon 3/8 inch thick on the ends of each of the pieces. The piece of stock laying to the left is a board that I have with a 1/4, 3/8 and 1/2 inch mortise cut as a jig for testing my tenon thickness. I usually cut them a little thick and plane them to size after the mortises are cut. I will put a peg in the joint later when it is glued up.

Now I need to cut the mortises in the top of the legs. I use my hollow chisel mortiser since I have it. I could cut them by hand or drill and chop them out but this is quicker for me.

After I make the mortises, I lay out the aprons and number the tops and the mortises in the legs.

Then I clean out the mortises and fit each tenon by planing it to fit the opening.

I like a good snug fit, if I use yellow glue the tenon will swell as soon the the glue goes on, if i fit it too tight I won't be able to get the tenon in once I apply the glue. If I use hide glue it does not swell as much so I can leave them tighter to start with.

Once I have planed all the tenons, it is time to try a dry fit of all the pieces. Here is the result. There is still a lot of work to do on the frame. I need a drawer opening and drawer runners. There are also stretchers to be added between the legs. But it looks good so far.

Next I want to clean up the burn marks on the legs. I tried to do it with a hand plane but of the two that I tried they both tore the grain. I do not have any high angle planes which probably would have helped or may be I just need to really sharpen my plane blades better.
I decided to use a cabinet scraper which worked well and did not tear the grain.

All cleaned up and ready for the next steps. I am going to add the lower stretchers.

Here is today's video:
No comments:
Post a Comment