I mill the stock to 3/4 inch and cut the pieces to size.

I marked out the slope of the desk lid which turned out to be 15 degrees. The top and lid will overhang the sides by 3/8 of an inch. The front and back will be dovetailed together. I will make a sliding dovetail to hold on the narrow top piece.
First I am going to cut the sliding dovetail along the top. Then cut the slope on the sides.

I set up the router table with a dovetail bit to cut a 1/2 inch high dovetail along the top edge. Since cutting the slope will remove the top material I can go past the beginning of the slope with the dovetail, since it is waste.

Cutting the first half of the dovetail is simple. But I want to cut the other side of the dovetail from the opposite direction in the router table. This saves a second setup with the router bit. This is dangerous since the router bit wants to pull the work out of your hand. So I use a stop block to help control the cut. It is still difficult.

Next to cut the 15 degree slope on to the sides. I set up my radial arm saw to cut most of it. Still have to use a hand saw to finish the cut. Later I decided to make the sliding dovetail a stopped dovetail so I could have used the saw to cut it all since I removed 1/2 inch from the front of the dovetail.

You can see I clamped the wood to the fence to hold it in place, I don't like to get my hands anywhere near the saw blade.

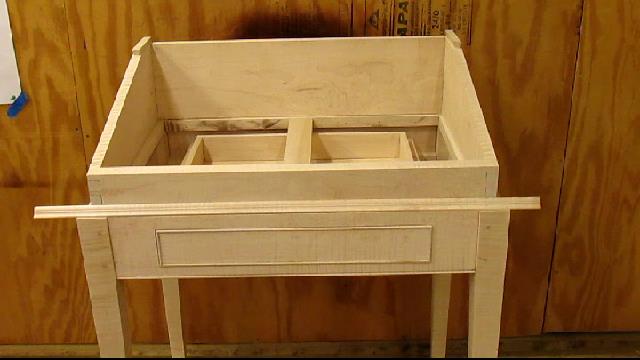
Now I need to layout the dovetails for the front and back. I pick an arbitrary size and number leaving enough material on the top and bottom. I will put a groove in the case for the bottom to slip into. As you can see I like tails first.

Chopping out the tails first.

Sawing the pins next, always saw on the waste side of the line and leave most of the line when sawing the pins, then chop them out and fit them together. If you are careful they should just slide together.

Here it is fit together sitting on the frame. Piece of waist molding in place to see how it will look. You can see the sliding dovetail for the small top piece.
I cut a dovetail on the underside of the top piece and slid it on from the front. I had decided to make it a stopped dovetail so you can not see it from the front of the desk. Although the lid will cover it when it is closed.


Next I need to put a groove along the bottom to hold in the bottom of the desk. I will use 1/2 stock glued up to make the bottom panel.

This will complete the desk case construction once the bottom panel is in. Then I will begin to make the desk lid with bread board ends.

Here is today's video:
No comments:
Post a Comment