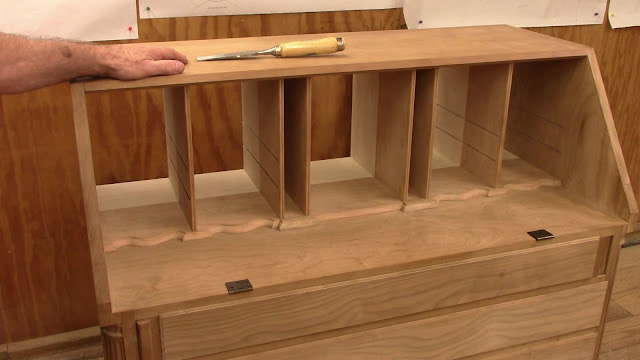
I have marked them out on the vertical dividers and the sides of the desk.
Now I am ready to cut the dados with a 3/16 inch bit 1/8 of an inch deep. I am using a rule that I made which is the width from the edge of the router guide to the router bit.
I can put the rule on the lines that I drew and then clamp a straight edge to the rule. Remove the rule. Then I am ready to cut the dado right where it needs to be.
These are stopped dados, I stop them 3/8 of an inch from the front.
You can see that I have all the dados cut now.
Now for the horizontal dividers. I milled up a bunch of 3/16 inch stock to fit in the grooves. Since they are stopped dados, I need to cut out notches on each corner so the divider can slip all the way to the front.
The template I made earlier matches the curve on the back of the round over on the base. This is the curve for the drawer fronts.
Then rough it out on the band saw leaving about 1/16 of an inch away from the line.
Then I used a flush trim bit to clean up the front edge.
Then I used the beading bit with a bearing to put the bead on the front of the divider.
Now the upper horizontal divider needs to be divided into the pigeon holes. First I need 3/16 inch dados down the center of the upper divider. I use the same technique as before to route the groove in the center of the divider. I also put a matching dado on the underside of the top for the divider.
These dividers have a ogee shape on the front edge. There was a photo in the article that I am using for reference so I blew it up to the size I needed. Fine Woodworking Magazine March April 2002
I made a template again like before to flush trim the fronts after sawing out the pattern on a scroll saw. Then put the bead on the front using the beading bit. The tight curve in the lower portion with have to be cleaned up with a chisel.
All of the dividers are in place. I am going to glue them in later when I am done with the document folders.
I am making the valances now, I made a template from a picture in the article. Then cut out 8 small pieces of 3/16 inch cherry.
I am going to tape 4 pieces together and gang saw them out on the band saw. Then flush trim them. They do not need a bead on the edge. The small notch in either side will have to be carved.
That is it for today. Next will be the hidden document folders.


You mention in the accompanying video that the vertical divider joins the front part of the horizontal divider with a v notch. Did you actually do this? I can't find that being shown in the video.
ReplyDeleteWoody Dixon
The correct way is to make the v notch and you are correct that I didn't show it.
Delete