This should be interesting! They are a duplicate of the side molding only bent with a volute at the end.
They are made of a composite of two pieces. The lower piece is 7/8 inch thick and contains a 1/4 inch flat with the cove and bead. The upper piece is 1 1/4 inch thick but only at the end for the volute, the majority is 7/8 also which contains the ogee and two flat steps that transition to the lower piece.
Together they make up the same look as the side molding.
I made a cardboard template of the over all shape and height.
I will make a practice gooseneck out of soft maple so that I can figure out how I am going to make this curved molding.
I have a piece of the side molding to get the depth of each cut since they have to come out even with 7/8 of an inch in each piece.
The top piece is only 1 1/4 inches wide and contains two flats or steps. This is followed by an ogee at the top. I use the bandsaw to saw away the front waste of the molding leaving 1 1/4 inch. I can now route the two flats in the molding using a rabbeting bit with different sized bearings to create the steps. I can not route it all but it will help quite a bit with the carving.
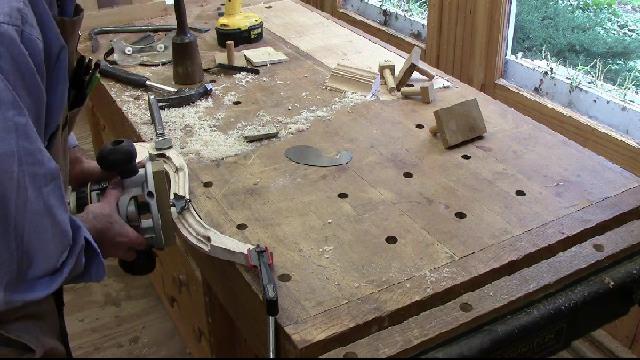
At first I thought I would have to carve the entire ogee, but I decided to try to use my router free hand with a false base which is narrow enough to follow the curve. I have used this technique before on curved work. I was able to put the ogee on much of the gooseneck, again it cut down my carving time.
Using the right sized gouges make the work of duplicating the curves a little easier, the grain changes directions around curves, that is something to watch out for.
Carving the lower piece of the gooseneck is a little easier. I used the router with a large cove bit to rough out the shape and remove excess material. Then I used a 1 inch gouge to carve the shape between the two lines. I used the rabbet bit again in the router to put a 3/8 inch step in the lower part of the molding which I will turn into a bead after I carve the cove.
Here is how the two pieces look with the cove roughed out before I add the bead on the bottom.
Using the same technique that I used for the ogee, I free hand route with a beading bit on some of the the lower edge.
I can not get too close to the inside curve because of the router base. So there is still about 3 inches of the bead to carve.
Here is the completed two moldings after I carved the areas that I could not route.
Now I need to work on the volute. To make it work on this practice piece I will need to glue on a 3/8 inch piece to get the correct height in the front. When making the good gooseneck I will make it from one piece 1 1/4 inch thick on the top piece of molding.
I started to carve the volute but I did not do so well. In addition I decided that the pattern for the volute was one that I did not like. There are multiple styles of this molding on the different Chapin Highboys. I am going to reproduce the molding that is on the one that is at Winterthur.
I have decided to start over and make a second practice gooseneck. I think I need the practice.
Below is a picture of the next practice one that I am going to make. Notice that it is 1 1/4 inch thick in the front by the volute and 7/8 inch for the rest. This is how it will be made when I work the cherry.
So that is it for Part 1 of this making of the gooseneck. Part 2 will be doing it over with the correct stock.


No comments:
Post a Comment