Search This Blog

Sunday, October 30, 2016

Chapin HighChest Mounting Crown Molding Step 12

It has been awhile since I have posted anything because I have been on vacation and had other chores to do.  I am just now getting back to working on the Chapin highchest.
In the last post I made practise moldings for the front and sides of the upper chest.
Now I need to make the molding with good cherry stock.
I started by milling the cherry to size 2 1/2 by  1 3/4 for the sides and 1 3/8 by 1 3/4 for the front. Then like in the previous post I dadoed the pieces to create steps for the hollows and rounds to create the shapes.


Then I used the hollows and rounds to create the ogee shape on the side molding.


Having completed that, I decided that I needed a scraper to clean up the molding shape and to insure that the shape was consistent across the entire molding length.  I was going to need this scraper for the gooseneck moldings as well. I pasted a piece of the paper template onto  a putty knife and ground it on the bench grinder.


Once the pattern was ground I was able to use it as a scraper across the shape on the length of the molding.


This is the completed side molding with the ogee, cove and bead.  Now I need to repeat the cove and bead on the front molding


Here I am using a 1 inch round to create the cove on the front molding.  Later I will use a router with a beading bit to create the bead.  Then clean up the molding with scrapers and sandpaper.


Now that the molding was made I need to mount it  on the chest. I started by mitering the left corner of the front molding.

Then I mitered the left side molding to match that front edge.  When I was satisfied I tacked the left side molding in place with small finish nails.

While the front molding was still just clamped in place I removed it and mitered it to the right corner of the chest. Then I tacked the front molding in place with finish nails.


Then I mitered the right side molding to match the right front molding. When I was satisfied with the fit I tacked the right side molding in place.

Now all the molding was tacked in place, I removed the molding leaving the nails in place so that I could replace the molding exactly where it had been before gluing.

 
I glued the entire front molding and tacked the molding back in place with the 3 nails.  Then I added the side moldings but only glued the first 4 inches in the front of the side molding and then tacked in the 2 nails in the center and back.

I added a nail to each of the mitered joints to help hold together the seams.  I still needed to set the nails and cut off the extra in the back of the side moldings.


Now I am satisfied with the crown molding, it is time to start working on the gooseneck front moldings.

Here is today's video:

Tuesday, October 4, 2016

Chapin High Chest of Drawers - Making Crown Molding with H&R Step 11

The next step will be to make the crown molding for the top sides and the front of the upper chest.
Below is a picture of the side molding on the upper chest. It starts with an ogee, then 3 flats, the a cove, followed by a bead.


This is a photo that I took at Yale when I was studying the Chapin Highboy.


Doug Moulder made me a full size drawing of the molding with his C.A.D. software.  This will make it easy for me to copy the pattern.


The molding is 1 3/4 inches wide by 2 1/2 inches high.  I milled some soft maple to that size and pasted the molding pattern to the edges.  This will make it easier to matched the profile to the wood.


Here I am using a 1/4 inch dado setup to remove the waste material so that I can use my hollow and round planes to cut the profile.  I have created steps here for the ogee portion of the molding.


Now I have to take out the material for the flats and the cove.


I am taking out the last little bit with a regular saw blade because of the size of the cut.


Now I have to saw off the support piece and leave enough material for the bead on the bottom of the molding.


I added the bead on the bottom with the router. I learned later that I should do this last, but then again this is what practise is for.


Ready for the hollows and rounds. Here I am using a 1/4 round to make the hollow upper part of the ogee.


Then I used a 1/4 hollow to create the round on the bottom of the ogee.  Here is the ogee complete.


Now for the cove. I am using a 1 inch round here to remove the material for the cove.


Everything went well, except I ran over the bead. This will not work since I can not get that close to the bead with my round molding planes.


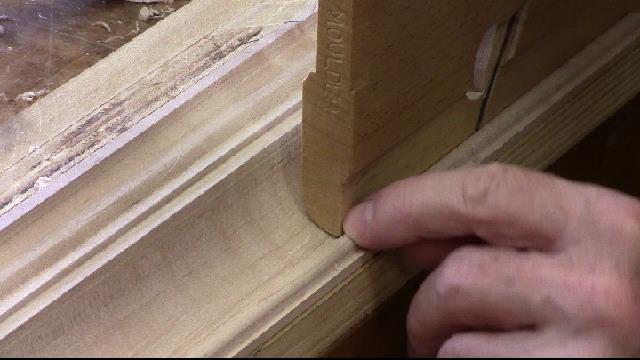
Doug Moulder brought over his side round molding planes, these are flat on one side and round on the other.  There is a matched set one for each side.


The side rounds are what I needed to get close to the bead but not cut into it as you can see in the picture below.


Doug also brought his snipes bill planes.  There are used to start a bead in the middle of a board, they are also matched pair for left and right planing.  We weren't sure that we would need them. As it turn out we did not.


Now the molding looks good, I have had enough practise so now I need to do this with the cherry stock and then miter and mount on the top of the chest.


Here is today video: