Here is a picture of the capital turned on a practice piece with one that has been cut to the slope below it on the table.
I used the cut offs from the sides of the desk to help match the grain, I added a 7/16 inch strip to make the 1 1/4 inch square stock. I have not done this before so we will see how it works out. If not I have two on the other side.
I prepare the stock by gluing up four pieces of 1 1/4 inch cherry and placing craft paper between the joints. I use hide glue to hold it together.
Now I have turn the base and capitals. I start by turning a square edge pummel and then turn the end round. Then I lay out the pattern and turn the shapes.
The design is not too complicated. Cove and bead with a few flats. Need to check the diameter from time to time.
Turned the capital on this end, now I need to turn the base on the other.
I will look something like this once I get the fluted quarter column made.
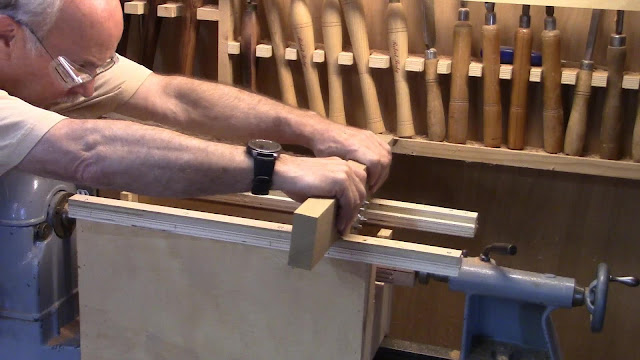
I have used this box on top of the lathe a number of times in earlier posts for fluting the glued up column. At this point I have turned the column round and to the diameter that I want.
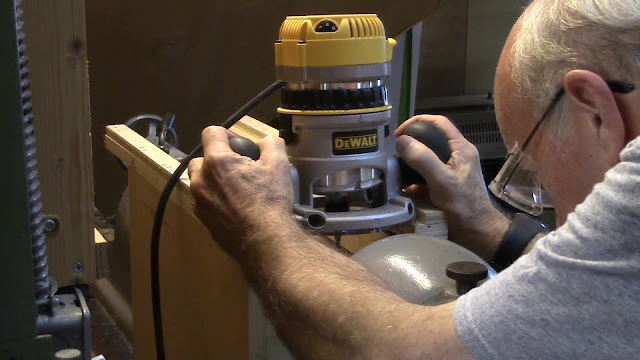
Then I use my router with a 3/16 inch straight bit to make the flute. I have marked the edges of the cylinder where I want the flutes so they come out even.
Here is one quarter of the cylinder completed with the router. I will later finish the flutes with a scratch stock.
This is a scratch stock I have used before to make the flutes in quarter columns. It rounds the bottom of the flutes.
Here are all three together. I have only split apart the top capital.
The quarter columns will need to be cut to length but I'll do that later when I install them.
The capital has a special joint that needs to fit under the writing surface. I will show how I made this in the next post and video. You can see the line above the joint near my thumb where it will be cut as part of the slant front.
Here is today's video:


Nice work David. I'm about to do something similar, just wondering how you indexed the lathe.
ReplyDeleteHerman
Herman, the lathe had an indexing head so i just had to line it up. However i have done it by locking the stock in place and layout with a flexible ruler
DeleteThanks David. Just starting on the Mauritz chest shown on the SAPFM site, which calls for these. I hope our group can reconvene in Livonia soon, I'm very tired of the state of affairs which here in Ontario feels like living in a dictatorship.
DeleteThats seems to be going around, hopefully they will sort this out soon
Delete