Search This Blog

Wednesday, November 23, 2016

Chapin HighChest Making the Lattice Fretwork Step 15

I completed the gooseneck moldings and mounted them to the top of the case. The original chest used only one screw countersunk on the top of the molding to secure each of them in place.  I followed that method and hope that the fretwork will help add some strength.


The gooseneck moldings came out well using the method I described in the previous two blog posts. Lots of carving.


I have a full sized picture of the molding and fretwork from the original Chapin chest, so I was able to copy the pattern.


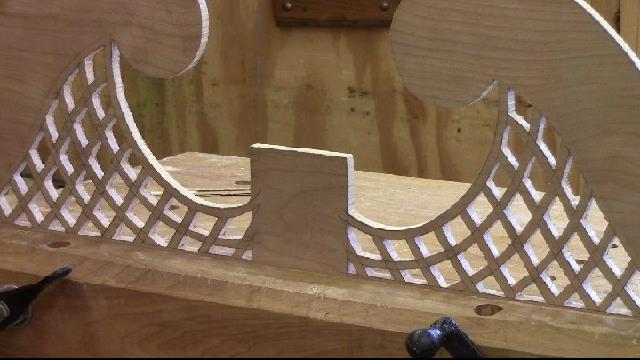
I milled a piece of cherry 10 1/4 by 32 3/4 inches to cover the entire area of the lattice fretwork.
Then resawed it to 3/8 of an inch thick. I mounted it in the rebate that is behind the gooseneck moldings so I could trace the pattern on the stock.


Now I could trace the lattice fretwork pattern on to the board from the photograph.


Using the bandsaw I cut out the pattern around the outside of the gooseneck molding and leaving room for the pedestal in the center of the fretwork.
Then I drilled holes in each of the squares so I could put a scroll saw blade through and cut out the waste from each square.


I used my scroll saw to start to cut out the squares but it proved to be too slow.  Each time I switched squares I had to raise the blade, move to a new square and then refasten the blade under the table.


So I tried a jig saw or saber saw, I used it free hand and that worked ok but it was cutting on the up stroke and leaving rough edges on the squares.
I used this box with the jig saw mounted under the surface before for another project, only the blade fit through the top. I thought I would give it a try.


This allowed me to easily place the squares on the sawblade and maneuver the piece to cut out the waste in the squares. It also cut on the downstroke so the tearout was on the bottom or back of the lattice.


All cut out, now all I have to do is clean up the squares with my small rasps


Need to carve the intersection of each square so that it looks like a basket weave, this is not difficult just tedious.

Clamped in place for the time being, I need to make the pedestal and cap in the center and then decide whether to glue it or screw it together.


Here is today's video:

Wednesday, November 9, 2016

Chapin HighChest Making a Gooseneck Molding Part 2 - Step 14


I have decided to start over on another practice gooseneck.  This time I will make it with the top piece as one at 1 1/4 inch, this is the way it will be made out of cherry for the chest.

As you can see I traced the pattern on an 1 1/4 inch piece of soft maple. Then I cut away 3/8 of an inch on all but the volute. I did that on a band saw. Then I cut off the waste with a hand saw and flattened the board.


I also made a new template for the volute. This is the pattern on the chest that is at Winterthur. I like it better than the one I have been using.


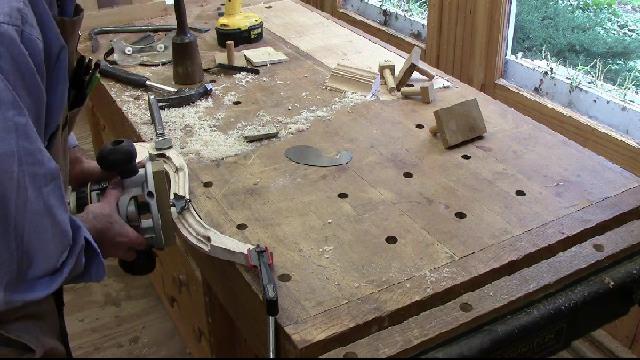
I cut away the front part of the top molding because it is waste.  Then with my router mounted over head to my radial arm saw I am able to cut the two rabbets along the front edge of the molding.  I did not complete the rabbets, a portion will have to be carved.
I have used this overhead routing before, I have a youtube video in my channel on using it here:

https://www.youtube.com/watch?v=xTL29v_HFPY


Using the hand routing technique I used before I put a partial odgee on the molding where I could access it.  This helps with the carving by having the shape to follow.


I drew a line to make a spiral for the volute, then using a hand saw I made a saw kerf all the way around the spiral.  This helps with the carving.


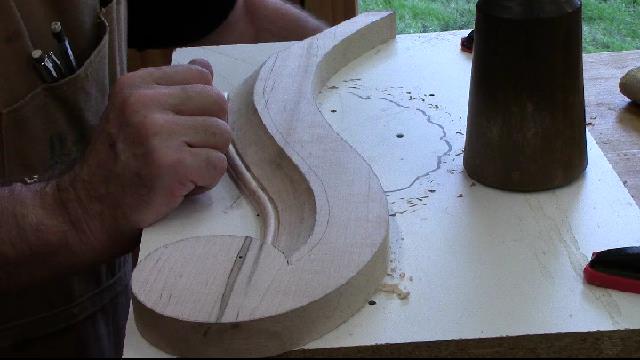
You can see me taking off the waste around the volute.  I'll have to put the pattern on again after I carve the ramp for the volute.


Below I have carved the cove and the pattern into the volute as well as extended the ogee and rabbets to the volute


 Now I have rounded over the volute so it looks like a donut.


Now I need to cut away the waste from the back of the molding.


I cut out the lower portion of the molding on the bandsaw and roughed out the cove with a cove router bit.  This removed a lot of the waste. Here I am carving it to shape with a 1 inch #5 gouge.

Once it is flush with the 3/8 inch rabbet on the bottom I will use the router to cut out the bead.


Here I have routed the bead on the bottom and cleaned it up and extended it to the circle with carving.
So it is ready to be mated to the top piece.


I mitered the edge and tacked it to the upper chest to see how it looked.  I also put a sample piece of the lattice behind the molding to help with the spacing since this lattice will be behind the entire top moldings.


I am satisfied with the plan to make the goosenecks.  But I still have some final carving to do.
The under side of the volute need two curved rows.

 I did one and it was not very good since I made it exactly opposite of the way I should have, so I had to start over on my other practice piece.

 Here I am doing it correctly.

The pattern on the bottom is complete. Glad I practiced the carving.


I think I am ready to make the good ones out of the cherry stock.  So I am going to mill the stock and get started.

Here is today's video:

Thursday, November 3, 2016

Chapin HighChest Making a Gooseneck Molding Part 1 - Step 13

Time to start on the swan neck pediments or as some call it a gooseneck molding.
This should be interesting! They are a duplicate of the side molding only bent with a volute at the end.


They are made of a composite of two pieces.  The lower piece is 7/8 inch thick and contains a 1/4 inch flat with the cove and bead. The upper piece is 1 1/4 inch thick but only at the end for the volute, the majority is 7/8 also which contains the ogee and two flat steps that transition to the lower piece.
Together they make up the same look as the side molding.
I made a cardboard template of the over all shape and height.


I will make a practice gooseneck out of soft maple so that I can figure out how I am going to make this curved molding.

I have a piece of the side molding to get the depth of each cut since they have to come out even with 7/8 of an inch in each piece.


The top piece is only 1 1/4 inches wide and contains two flats or steps. This is followed by an ogee at the top. I use the bandsaw to saw away the front waste of the molding leaving 1 1/4 inch.  I can now route the two flats in the molding using a rabbeting bit with different sized bearings to create the steps.  I can not route it all but it will help quite a bit with the carving.


At first I thought I would have to carve the entire ogee, but I decided to try to use my router free hand with a false base which is narrow enough to follow the curve.  I have used this technique before on curved work. I was able to put the ogee on much of the gooseneck,  again it cut down my carving time.


Using the right sized gouges make the work of duplicating the curves a little easier,  the grain changes directions around curves, that is something to watch out for.


Carving the lower piece of the gooseneck is a little easier. I used the router with a large cove bit to rough out the shape and remove excess material. Then I used a 1 inch gouge to carve the shape between the two lines.  I used the rabbet bit again in the router to put a 3/8 inch step in the lower part of the molding which I will turn into a bead after I carve the cove.


Here is how the two pieces look with the cove roughed out before I add the bead on the bottom.


Using the same technique that I used for the ogee, I free hand route with a beading bit on some of the the lower edge.


 I can not get too close to the inside curve because of the router base.  So there is still about 3 inches of the bead to carve.


Here is the completed two moldings after I carved the areas that I could not route.


Now I need to work on the volute. To make it work on this practice piece I will need to glue on a 3/8 inch piece to get the correct height in the front.  When making the good gooseneck I will make it from one piece 1 1/4 inch thick on the top piece of molding.


I started to carve the volute but I did not do so well. In addition I decided that the pattern for the volute was one that I did not like.  There are multiple styles of this molding on the different Chapin Highboys. I am going to reproduce the molding that is on the one that is at Winterthur.


I have decided to start over and make a second practice gooseneck. I think I need the practice.
Below is a picture of the next practice one that I am going to make.  Notice that it is 1 1/4 inch thick in the front by the volute and 7/8 inch for the rest.  This is how it will be made when I work the cherry.


So that is it for Part 1 of this making of the gooseneck.  Part 2 will be doing it over with the correct stock.

Here is today's video: