Search This Blog

Wednesday, August 26, 2015

Drop Leaf Cherry Table Making the Stringing and Drop Leaf Joints - Step 5

I have been busy the last two days in the shop.  The top has been more work than I thought but it is coming along well.


After gluing up the top, the joints were not close enough to be acceptable so Doug Moulder suggested that I hide these joints with some inlay stringing.

I have some left over tiger maple from a previous project that should make a nice contrasting decorative inlay string.
 

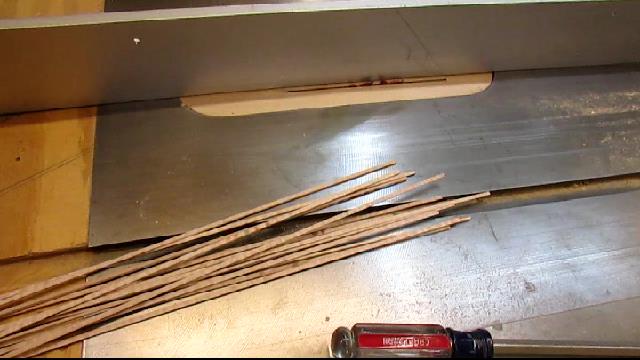
I cut it into 1/16 inch strips and then cut the 1/16 inch strips into 1/8 inch wide strips on my table saw with a zero clearance throat plate.

I used 1/8 inch router bit in some scrap cherry to test the width of the stringing.  It is just slightly wider than the slot.  I'll trim the stringing to fit in the slot later.


I made a measuring board which is half the width of the router base so I can set up the clamping boards to route the groove for the stringing.  I test the set up here on a piece of scrap plywood.


Looks like this set up will work.  So, I set it up on the table top. Here it is ready to go, notice that I have marked the center where the three will meet.  I don't want to go too far, so I stopped short of the center and cut them with a bench chisel.


Last one routed now.   Now I chisel out the center.


I made a simple jig to clamp the stringing in so I could trim the stringing to fit in the grooves. Just two pieces of scrap with a 1/8 inch groove between the two boards.  Three screws pinch the stringing between to hold it while I use my low angle block plane to trim it to size.


Good tight fit.


Stringing glued in after mitering the three in the center with a bench chisel. They have 30 degree points. 


Now I start to work on the drop leaves.  I milled the board that I selected earlier and used a circle template to trace the circle on to the milled board.  I free handed the circle cut on the band saw leaving myself about a 1//32 extra to be sanded off on the spindle sander.


Here are the three drop leaves next to the triangle top before I routed the rule joint on the two edges.
I matched the grain to the three sides as best I could.


After routing the rule joint, I had to miter the corners where the two drop leaves come together.  This is a 60 degree cut, so I set it up on a piece of MDF angled at 60 degrees and then used a guide to cut the 90 degree cut off by hand.

Here is how it goes together.  The top with the 5/8 inch round over with 1/8 in fillet, and the 5/8 inch hollow that I cut with the core box bit.


And now put together.  I will fill that small opening in the end of the top.


I also put an ogee edge on the out side of the drop leaves. 


So here it is altogether, ready for the hinges.  I am glad that is done.


Here is today's video:

Sunday, August 23, 2015

Drop Leaf Cherry Table - Rule Joint and Making the Top - Step 4

I decided to tackle the rule joint for the drop leaves next.  I did some research found a couple of old articles in Fine Woodworking on how to make a rule joint.  I could use my hollows and rounds but as it happens I need a 5/8 inch round over with 1/8 fillet and a matching hollow.


 I just happen to have a 5/8 inch round over and matching core box router bit.  I used some scrap cherry that I had which I milled to 3/4 inch.


I made multiple passes to sneak up on the final size.  As you can see here there is 1/8 fillet before the round over and cove begin.
I had ordered hinges from Horton Brasses last week and they arrived on Monday.
So now I need to layout and cut the mortises for the hinges.


There is a long and short side to the hinge and of course a deeper area where the barrel of the hinge rests.

I used my Lee Valley router plane to cut these mortises.


I am cutting both mortises at the same time as I lower the blade of the router plane it makes it easier to get both of them to the same depth. After a little work I attached the hinge and placed it on the table frame.


One of the main reasons that I made the practice joint was to see that the 5/8 inch over hang was enough to allow the drop leaves to hang vertical.


Looks good. Now I can swing it horizontal.
I still have to design a support mechanism for the leaf but I do that later.  I am happy with the joint and hinge design.


Now I have to find material for the top.  It will be made from three pieces mitered in the center to make the 25 inches necessary to have long grain on the three sides.  They should come from the same board so the grain and color match.


I have three old cherry boards here which should work.  I need 7 1/4 inches by 25 inches for the top three pieces and 7 5/8 inches by 26 inches for the three drop leaves.  I want them to be all the same color.  Since the boards are triangles and curves I can work around defects in the boards.


After I mill the stock to 3/4 inch they look very good with a little quilting in the gain.  Should be a pretty top.


Cutting the top triangles is a real challenge for me.  I set up the radial arm saw at 30 degrees and made a template that I thought was perfect.  Then I used the template to set the saw angle with the teeth of the blade riding against the template.

Well two out of three isn't good enough.  The third one did not fit tight enough for me.

So I decided to scribe lines on to a new piece and hand saw the angles.


It worked pretty well but I still had to use a hand plane to finish the edges.


The gaps are closer but not perfect.

Now I added a groove on each of the joints which is 1/4 inch wide and 3/8 inch deep for a spline to hold things together.  As you can see when I will glue it there is a lot of end grain to end grain glue surface so a spline is required.

I built a frame with wedges to hold the triangle together as I glued up the three parts.


Even after I applied the wedges I couldn't get the joint lines as tight as I would like, so I am going to have to do something to make it look better.   Doug Moulder suggested that I put string inlay along the joint lines to fill them in.  I think it is a good idea.  I have to buy or make some contrasting stringing.

Next will be to put the rule joint on the edges when it dries.

Here is today's video:


Saturday, August 15, 2015

Drop Leaf Cherry Table - Making the Stretchers, Fitting the Tenons and Assemble the Frame - Step 3

I got into the shop a bit the last two days, so I was able to glue up the legs with old brown glue. I was very careful to make sure they were straight and flat on the bench. The small pieces of stock raised the flat parts to give clearance for the turning which are 1/8 inch larger than the flat pieces.


I used my k-clamps to help keep them straight as well as hold them together. With 1 1/8 inch round tenons on the turned pieces I don't think these will be coming apart anytime soon.

Then I milled some cherry stock for the apron and stretchers. 4 inch for the apron and 1 7/16 inch for the stretchers.  Both were 13/16 inch thick.

I allowed for 1 inch tenons on each of the pieces.  These tenons will have to be mitered to fit into the angled mortises on the legs.  I will miter them as it fit them to the legs.

I used my tenoning jig on the table saw to cut the tenons since they were all the same, so once I had set it up it made quick work of cutting them.  I am holding a backer board on the piece to keep the saw from tearing out the back as it goes through.


Next I need to put a bead on both edges of the stretchers and on the bottom of the apron.  There are lots of options to putting the bead on the pieces. I could use the router, scratch stock, beading plane.  I used a Stanley 66 beading plane with cutters from Lie-Nielson.  One bead was 1/4 inch, the other was 3/8.  But the 3/8 cutter would have gone too deep. So I just started the cut and finished rounding it over with a hollow plane.


This cherry really worked well to the plane.  A pleasure to work.


Then I needed to fit the tenons to the leg mortises.  I want them to be a nice snug fit.
So I used a block plane to shave off some of the material until I got the correct fit.


These joints will be pegged later as that was done on the original piece.

Once the tenon fit properly, I cut a miter on the side so that the two piece would both fit in the leg at the same time.  Again I used my block plane to trim the miter for final fitting.


First pair fit, looks good.  Now all I have to do is fit all of the others.


All set, I like the fit and I surprised myself how well it went together.  My measuring must have been better this time.


Now I have to make plans for the drop leaf supports, the top and hinges.

Here is today's video:

Wednesday, August 12, 2015

Drop Leaf Cherry Table - How I make a segmented turned leg - Step 2

I  have been traveling again, so it has been a little while since I have been in the shop.  In the last post I figured out that I wanted to make a segmented leg instead of trying to make it out of one piece.

There were two reasons, one I couldn't get the 1 3/8 inch diameter out of the 1 3/4 inch leg stock after it had been cut and second there was a lot of vibration when I tried to turn it in one piece.

In the last video I said I would detail how to cut the 60 degree angle on the legs.  I found an article in Fine Woodworking September 2008 where they were making a table with similar legs.  The article show how to make the stock in two cuts.  One with a left fence and one with a right side fence.


So here is how I did it.  I set the fence on the left of the blade.  Measured 1 3/4 inches from the fence to the lower edge of the blade set at 30 degrees.  I am using 1 3/4 inch thick stock which is a little wider then the 1 3/4 inch.


I made that cut and got the 1 3/4 inches on the bottom and a slope that is longer then 1 3/4 inch.  Next I need to cut the longer slope to 1 3/4 inch with the fence on the other side.


I measured 1 3/4 inches across the face of the slope and made a mark to line up the saw.  Then made the rip cut.


This is what it looks like after the second cut.  Two 1 3/4 inch faces at 60 degrees and the back two faces where the mortises go.


Then I chopped it into the sections that I need to turn the pommels.   Then I put center marks on the pieces and turned the pommels on center.


Once I turned all the pommels, I make up some 1 3/8 inch stock and turned the center pattern and the lower foot pattern.  I put circular tenons of 7/8 inch by 1 1/4 inch on the ends.  These will fit in holes drilled in the triangular blocks.


Drilling 7/8 inch holes in the triangular ends.  Notice I had to make a jig cut at 60 degrees to hold the pieces for drilling.  It seems I needed to make a lot of jigs to hold these odd shaped leg parts.


Here are the assembled legs next to the original practice one piece leg. The turned portions of the legs is larger than the triangular portion by 1/8 inch, so I will have to prop up a portion when I glue them together.


I decided to chop out the mortises prior to gluing up the legs because it would be easier.  I had to made another jig to hold the legs parts at  90 degrees to the hollow chisel.  I cut a 30 degree slope and a 90 degree stop in two blocks and screwed them to a piece of plywood.  The holes are for the clamps to hold the piece in place.


It worked pretty good except the clamp handles got in the way.  So I had to move the piece around to complete the larger mortise.


So here are the three segmented legs assembled ready for gluing.  The legs have a little excess material on  the top yet.  I will cut that off after gluing to make sure all three legs are exactly the same length.


Here is todays video: