Search This Blog

Monday, August 4, 2014

Glue Up of the Table Frame and I Start to Look at Material for the Table Top

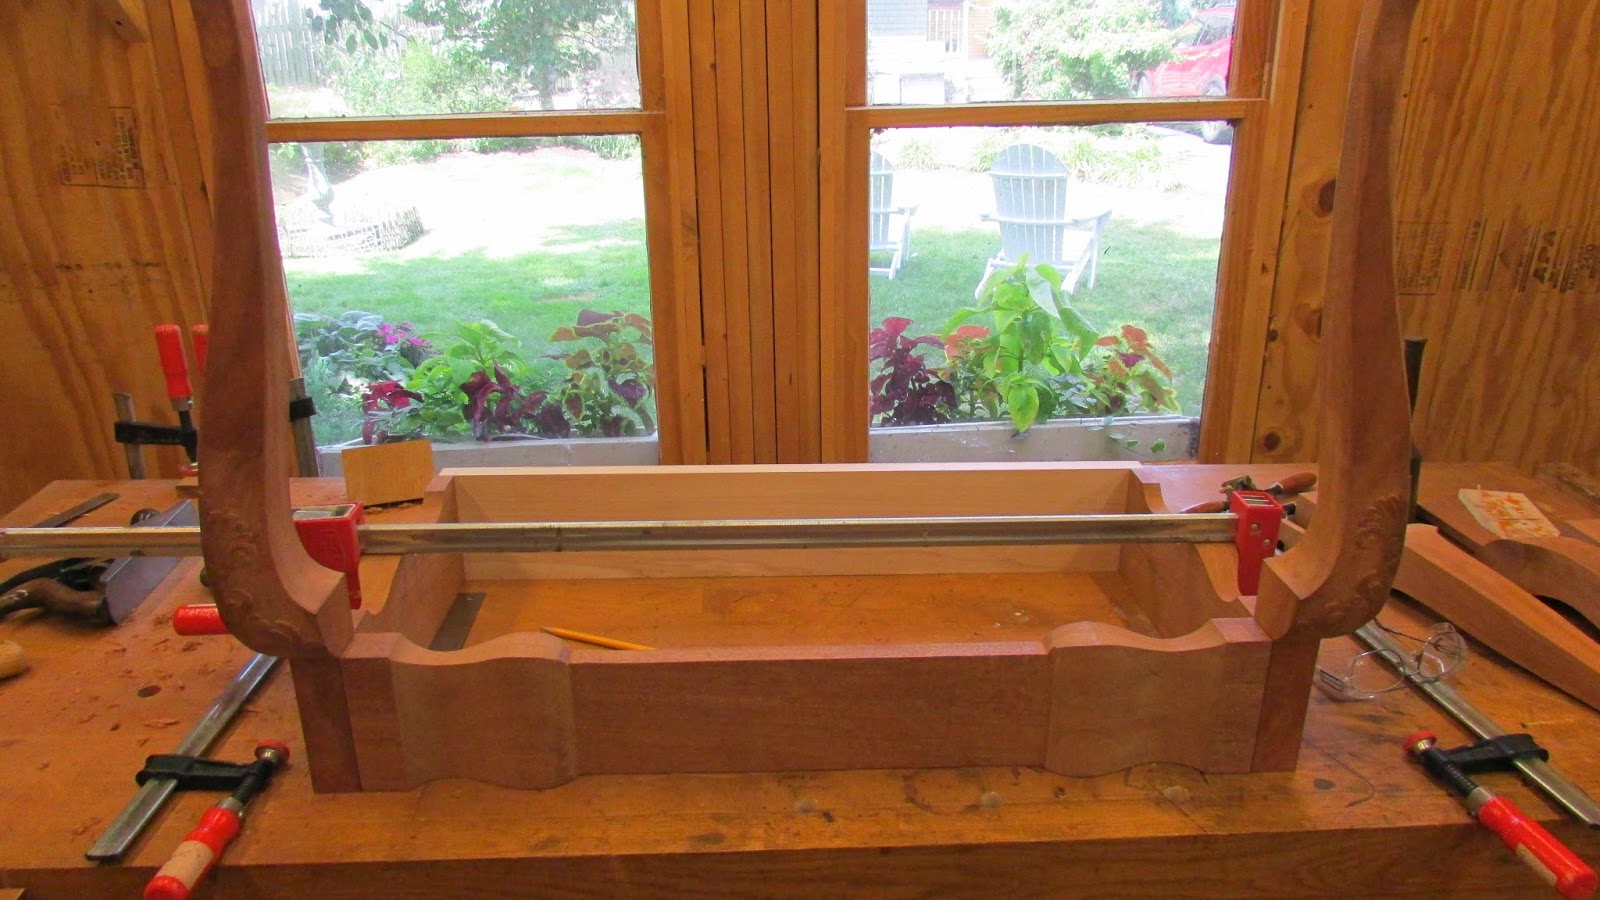
Well I glued up the table frame today.  I disassembled the swinging legs from the frame and of course disassembled the entire table prior to gluing.
 I used Old Brown Glue for the glue up.  It is what I have been using for several years now.  I use it on everything except edge gluing boards.
First I did the frame and then glued the legs to the swinging apron.
So now I have to wait over night for the glue to cure.

While I am waiting I started to look for material for the two top pieces.  These are 16 3/4 inches wide by 33 1/2 inches long.   I have a 20" by 9 foot 4/4 mahogany board which I bought to use for the top.
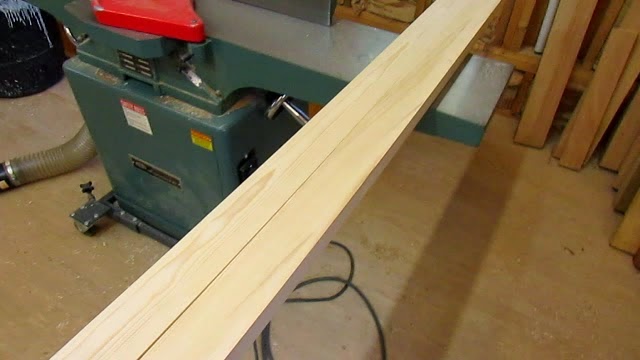
I used a hand plane to remove some of the rough surface on both sides so I could see the grain, color and imperfections in the wood.  I did find some discoloration at one end and some worm holes.
The top of half of the table swings open so it has to be good on both sides, the bottom half is fixed so it only has to be good on one side.  That makes it a little easier.  Still I would like the color and grain to match as best as possible from this piece of wood.  Here is a shot of some of the discoloration on one end.  I think this could be on the bottom of the fixed portion of the top.


 What do you think about the worm holes, should I leave them for character or fill them? Let me know with your comments.

Here is today's video

Saturday, August 2, 2014

Cutting Tenons on the Rear Swinging Legs - Completed the Construction

Well I have been working on cutting the tenons on the end of the swinging rear legs.  This has to be done very accurately.  I have centered the knuckle joint support and attached the 2 swinging aprons. Using the legs to check the dimensions I marked a line where the tenons shoulder should be.
  Then I cut the shoulder on the table saw and cut the cheeks with a hand saw.  Setting up the table saw to cut the cheeks would take a lot longer than just cutting them with a hand saw.
Once the tenons were fit to the legs, I needed to hog out the area the create the 1/4 inch tenon which fits in the 1/4 in slot on corner of the table.  This is required since the rear swinging apron is 1 1/4 and the leg is 1 1/2 inch thick. Then I cut the 1/4 recess on the rear corner of the table.
Then I pared the joint to fit and repeated the process on the other side.  Both legs now fit nearly flush with the assembly clamped to the back.  So it was time to turn it over and see how well it works.

It stands on it's own and the legs swing pretty well.  I have a little fiddling to do yet with one of the legs but it is close.  This completes the construction of the table frame.  So now I will glue it up and then add the knee blocks.

So here is today's video:

Thursday, July 31, 2014

Completed the Knuckle Joint - But it Squeaks a Little

Well I completed the knuckle joints on the rear swinging legs.  They work ok, but squeak a little.  Which means they are too tight some place.

In the last post, I had finished one side and they were ready for drilling. I set up a fence on my drill press table, clamped the assembled joint to the fence and centered a 1/4 inch bradpoint bit on the centerpoint of the circular joint.
I drilled halfway through the joint. Then turned it over and centered it again.  I did not have to adjust the fence again.
Then I repeated the drilling again.
While it was still clamped I drove a 1/4 inch steel pin into the joint.  Sorry,  not a wooden pin like the old guys would have used.  I think the steel pin will last longer.
Then is tested the joint and it was pretty stiff, which meant that the knuckles were binding.  So, I sanded off the points which were rubbing.  I was easy to see since the wood would get shinny where it was binding.  After a few minutes it was moving freely.

Then I took it apart and began to work on the other side.  I matched and sawed the other knuckles.
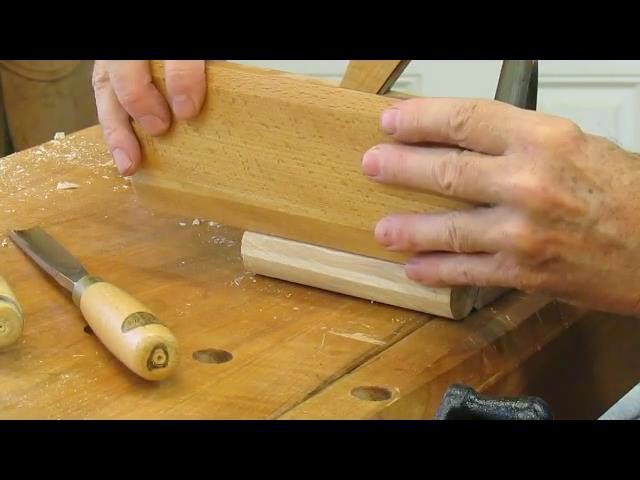
I made a small dowel which is 1 1/4 inch round.  This matches the size of the hinge knuckles.  It helped me determine when the recesses were deep enough.  It saved time.

Once the recesses were carved... And that is a lot of work since it is end grain. I was ready to fit the hinge which went together much easier than the first.  I repeated the drilling process like the first one.
This side does not squeak.

The knuckle joint is complete for the moment.  Still needs a little sanding to eliminate the squeak on the first one.
Now to cut the tenons for the legs.
Here is today's video:

Tuesday, July 29, 2014

Making a Knuckle Joint for the Rear Swing Legs

The rear legs on the Townsend Card Table swing out to support half of the top when it is open.  To accomplish this the rear legs are attached with a wooden hinge or knuckle joint.  The hinge has to fit tight so the legs don't sag when extended.  This joint is not overly complex about as difficult as hand cutting dovetails.
There are multiple ways for making a knuckle joint.  I have decided to do it with hand tools.
First thing I did was layout the circles and center point for the knuckle joint.
 Next is to make a 45 degree cut on the back corner of each circle.  I did use the table saw for this step.
Then using hand planes start to round over the circles.  I used a carving gouge and a hollow plane to complete the circles.
Just using the hand plane I was able to get it fairly round.  Then used the hollow to smooth it over.
I repeated the process for all four ended.  Then I laid out the knuckle pattern on the ends and marked the matching pairs.
Here you can see the pattern for the knuckles. There are 3 on the fixed portion and 2 on the swinging portion.
Now I have to saw out the knuckles just like making dovetails and then chop out the waste.
Now all I have to do is get them to fit together.  This is not the fun part.
The insides of the knuckle joint has to be carved out to match the curve of the knuckles.  That area of wood is all end grain and tough to work.  But I did get it done after quite a bit of work.
Here is the result.

 I am not sure that I am satisfied with the result.  I may make them again.  Tomorrow I am going to put in the hinge pin and see how well it swings.
So here is today's video:


Sunday, July 27, 2014

Cutting the Dovetails on the Rear Apron and Cross Member

 I cut the rear apron from a piece of hard maple that I had in the shop.  It is 7/8 inch thick, so I think it will be strong enough.  Also, the hard maple is more difficult to work but it was there so I thought I would use it.   I suppose I should look up the wood movement between mahogany and hard maple since they will be dovetailed together.   But I didn't, so I guess I am living on the edge!

I picked an arbitrary size for the four tails that I am going to cut, I picked four because that was how many there were in the picture of the underside of the Townsend Card Table.  Here is what the layout looks like:
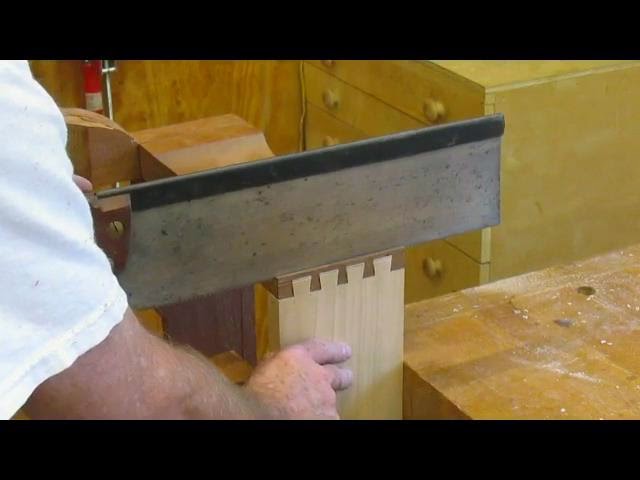
 I cut them out with my dovetail saw and coping saw to remove most of the waste.  Then I chopped out the remainder with my chisels.

Then I used the tail board as a template to trace the pins on to the mahogany sides.  These are half blind dovetails so it is a little slower to cut out the pins since you need to leave material in front of the tail. You can not saw all the way through.

Then I pared the tails to fit and assembled the rear apron
After that I decided to add the center brace, but I just realized that the front is 3/4" lower than the rear.
So just dovetailing it front and rear would not be possible.  I have to mortise and tenon the rear of the brace and dovetail the front.  So that took a little extra time.
Here's what it looks like now:
If you want to watch the process, here is today's video:
Tomorrow I'll start work in the rear leg support and hinge.

Saturday, July 26, 2014

Cut Out the Table Aprons and Tenons

I have a ten foot piece of 8/4 mahogany that is about 14 inches wide that I can not pick up myself.  Doug Moulder offered to come over and help me cut out the apron stock.  So we cut off about 3 feet for the aprons.
Here is what is left after we cut it off.
We ripped it to width, jointed and planed it to size.  In the earlier posts when I made the prototype, I demonstrated how I used the bandsaw and templates to cut out the shapes on the front and sides.  So I repeated the process with the good stock.
Now I have to clean up the saw marks and cut the tenons.  I used my spokeshaves, scrapers and hand planes to smooth out the curves and finish the flat surfaces. Work to be done.


Once the pieces were smooth, I scribe lines on the ends and cut 3/8 inch by 1 inch tenons with a backsaw.

Trim the tenons with a paring chisel and hand plane and fit into the legs.

The next step will be to dovetail the rear apron to the sides.  I'll get to that tomorrow.
Here is today's video:


Tuesday, July 22, 2014

Completed the Knee Carving - Ready to Make the Frame

I completed the knee carving on the second leg today.  Did a little clean up of the carving with files,  no sandpaper in case I want to go back to carving to touch up something.
Here is what they look like:

I still wonder if I should have glued on the knee blocks and did all the carving now.  I did that when I made a lowboy a few years ago.
There are the four legs side by side.
Tomorrow I will cut out the front and sides and make the tenons.  I want them to be tight,  the Townsend Card Table pictures that I have do not show any pegs in the joints.  So I will not be adding them, but the pictures do show glue blocks in the corners.

Saturday, July 19, 2014

Working on the Knee Blocks and More Carving

I took a break from carving this morning and decided to make the knee blocks for the legs.  My thought was that I might attach them now before attaching the legs to the apron.  My reasoning was that the carving on the knee extends to the knee block and it may be easier to carve them all at once.
So I cut out the pattern on cardboard, and used the bandsaw to cut out one of the knee blocks .  But after doing that I decided to wait until I have attached them to the legs after the table frame has been assembled.  There is not that much carving on the knee block.
So then I went back to carving the knee pattern.  Did not get that much done since I still have honey do's before the wedding reception party at our house tomorrow.  (Not my wedding.)
Here is today's short video:

Friday, July 18, 2014

Begin Carving the Knee Pattern on the Legs

At this point  in the project, I have decided to carve the knee pattern.  I could save it till later but I decided to get more of the carving out of the way.
I have a friend who has made a Townsend Tea Table and had traced the knee carving for that project.  He has sent me the photocopy of the knee carving.  This has saved me the time to create my own from the photos that I have from books on the Townsend furniture.
You can see in the video that I have some very good detailed photos of the leg carving.  This is very helpful for me to visualize what the final look will be.
I took the photocopy and traced it on to the leg, filled in the lines with pencil where it did not transfer too well.
Then I started to carve, again with #3 or 3/8" flat chisel.  Lowering the background to create the raised portion of the carving.  I have decided to relieve 1/16 inch. As  you can see in the picture this knee pattern is not very bold.
I have completed one side of the knee.  When I start to carve the veins I used a 1/16 inch #11 viener but I did not like the way it looked, so I switched to the v-chisel and completed the carving with it.
So here is today's video:
 

Tuesday, July 15, 2014

Back from Vacation and Completed the 2nd Ball and Claw

My wife and I were on vacation and went to visit my daughter in Colorado Springs, Colorado.  Had a great time visiting with the grandkids.

Here we are in Manatu Springs just after lunch.  Everyone wants to know if I brought back any pot since it is legal to buy there.  I'll never tell since it is illegal in Ohio.

Since we got back I resumed my carving of the second ball and claw foot for the Townsend Card Table.  I finished it today.  I recorded my progress using the time lapse photography that I used before.  The total time was about 4 hours for me to complete the carving over the last two days.  This I captured on an 11 minute video.
In this video you can see me carve the three remaining claws and talons.  Each of these is completed with the same process. After I completed them, I compared it with the other foot and found that the claws on the new one were a little larger than the other.  So I had to take a little off so they would match.

So the next step will be to carve the knee pattern.

Here is today's video:


Tuesday, July 8, 2014

Working on the Honey Do list - Painting the porch and Making the Molding

I had to take a break from carving the  ball & claw foot because my honey do list was piling up.  We are hosting a party in a couple of weeks, so I had to paint the front and back porch of our 109 year old Victorian  house.  The molding around the front porch needed to be replaced years ago, but I have been putting it off.  I have run out of excuses, I guess I have to replace it.  I will need about 36 feet and some of it will need to be curved.

I went to Home Depot and found a 2x8 12 foot that was almost clear.  The longer and wider construction grade lumber is usually better.
I have a large crown molding bit that I can use to make the molding.  Sorry, no hollows and rounds here.
I ran the lumber through the router on both sides and then resawed  down the middle to make 2 pieces from each 2 1/2 x 1 1/2.  For a total of 44 feet of molding.
Here what I ended up with
I sanded some of the rough spots and then painted it in advance of installing.
Bending around the curved part was a problem, but I worked out ok.  One of the honey do items done so now back to carving.
Here is a video of the process:

Saturday, July 5, 2014

Third Time Lapse Carving the 2nd Ball and Claw Foot

This is the third post following the progress of carving the Newport Ball and Claw Foot. 
Again I used time lapse pictures to record the steps.  Hopefully,  you are not totally bored (not board) at watching me carve the foot.  Since I have discovered how to do time lapse I thought that I would record all of the steps in carving one complete foot.  I should finish in one or two more segments.
In this video I round over the ball on the bottom four side and create and under cut the rear talon.
Since Doug Moulder wanted my wonderful voice instead of the music, I added a running commentary to this video.
One of the lower sides of the ball really gave me fits in carving.  The grain was quilted so no matter which angle I came at it, it would chip out.  Leaving holes instead of rounding over.  I used a pairing motion and finally files to finish that side.  It was the only one like that, what a pain in the ....
Here is today's video:

Thursday, July 3, 2014

More Time Lapse - Continuing to Carve the 2nd Ball and Claw

Hopefully you enjoyed the first time lapse video.  This one is a little better since I changed the angle of the camera. 
The goal of this carving session is to finish rounding over the 2 sides on the back of the ball.  Locate where the hole goes under the back talon.  Make the hole.
After that I turn my attention to the top 2 front sides of the ball.  These need to be rounded over and a lot of material removed.  The top of the ball is under the front knuckle and it should slope back from there.  Also when you look at the ball from all sides it should look continuous as it flows under each of the 4 talons.  This also forms the front talons on top of the ball.
Note that I use a caliper to measure the first foot and make sure the second foot is similar in size.
After rounding over all 4 sides of the top, I start to round over the bottom 4 sides and match the curves with the top.  I will continue to refine the ball shapes as I refine the foot through all of the carving.  So you will see me go back to shaping the ball in most of the videos.
Let me know what you think.
Here is the second video

Working on the Second Ball and Claw Foot for the Table

I haven't posted for a few days because I painted the porch and other chores.  But I have been working on carving the second ball and claw foot.  I have learned how to make my Canon camera perform time lapse photography.  Some enterprising programmer hacked the Canon Powershot line of cameras with his own operating system.  Now I have total control over my camera.
On longer tasks, it makes much more sense to do time lapse pictures instead of video.  I can also do time lapse video, but I try that at some later time.
I set up the camera and started carving.  I broke the time lapse video into 3 video sets so it shouldn't be quite as boring.
I will post links here to all three when I get them up on Youtube.
In the first video I take the foot that I started earlier with carving the foot into a cylinder and I work on the rear talon and muscles at the top of the back.  This is so I can locate where I want to put the hole for the opening between the ball and the back talon.  You will see me make the hole in the second video.  In the first video the goal is to start to round over the top of the ball on the back sides and create the rear talon and locate the position for the hole.
So here goes.  Let me know what you think of the time lapse video.

Sunday, June 29, 2014

Finally Finished the First Ball and Claw Foot

I keep track of my hours on the woodworking projects.  This foot has taken more hours than any of the ball and claw feet that I have carved.   Even after completing two practice feet, I was still very slow.  It is a good thing that I don't try to make a living from carving.  I would starve.
I am satisfied with the results of the carving and I cleaned up some of the bumps with files.  I use files for initial cleanup because I can always go back to carving if I see something I want to change.   If I use sandpaper I would not use carving chisels any more since the sandpaper would leave behind grit in the wood grain and quickly dull the chisels.   I will sand the whole leg before finishing once all of the carving is complete.
On to the next foot,  maybe I'll gain some speed.

Thursday, June 26, 2014

Working on the First Ball and Claw

Well I did get some time in the shop yesterday and today.  So I made some progress on the first ball and claw foot that I need for the Townsend Card Table.  In the previous post I mentioned that I was going to carve the two feet in parallel.   Well that is not going to work.  I did carve the two feet into cylinders but that is it.  Once I start to carve the ball I have to finish the entire carving,  I can not start and stop halfway through.  
So, I was able to complete the ball and start to work on the talons.  I did undercut the rear talon.  I should be able to finish up this foot tomorrow.
So here is today's video:


Tuesday, June 24, 2014

Close up of the Talons

Luke Addington asked if the talons looked fragile.  I did not make mine too thin.  I think I could make them  thinner and still be somewhat sturdy. Here is a picture of the practice feet.

Monday, June 23, 2014

Finished Shaping the Legs and Starting to Carve the Ball and Claw Feet

I shaped the legs using hands tools.  The rear legs are pad feet with no carving, so they are good to go.
The front legs have ball and claw feet and a carving pattern on the knee.
I have the ball and claw foot that I did for practice to use as a reference as well as the plaster cast that I purchased.  It helps me to look at a finished design while carving.
Hopefully the mahogany will cooperate and not be too difficult to carve.  I have noticed that that there are some changes in the grain direction so carving may be a bit challenging.
The first steps are to layout the lines on the two feet, then to carve the cylinder all the way around.  Previously I have carved multiple legs sequentially, first one then the next, etc.  This time I am going to carve them in parallel to see if it goes any faster.
So here is today's video:
 

Thursday, June 19, 2014

Done with Practice - Sawing and Shaping the Four Cabriolet Legs

I am finished with practice.  I need to get moving on the real table.  I am going to make the blanks and cut out the shapes for the 4 cabriolet legs for the table..
A few weeks ago, I went to Irion Lumber to purchase some mahogany for the table.  The leg stock was a piece of 12/4 10 inches wide by 8 foot long.  This should be enough for 2 tables.  
Right now I can get 3 legs from the width, so I cut 2 pieces of the length of the legs plus 2 inches so I would have a piece for the knee blocks.  I ended up with 6 legs.  I only need four right now.  So I picked the best of the group.   There are some worm holes in the stock but that only adds a little character.
With the bandsaw I cut the stock to 3 inches and then used the jointer and plainer to square up the legs.
Sorry, no hands tools at this point.
After the stock was squared, I made the template for the pad foot.  I had the template for the ball and claw foot from the practice pieces.  I traced the patterns on to the stock.  I turned the 2 pad feet on the lathe.
Now I am ready to cut out the patterns on the bandsaw.  I have a 1/4 inch blade in the saw and I cut them out as I did in the earlier videos on cabriolet legs.
It was very hot that day in the shop and that is the excuse I am going to use for not doing a really great job at following the lines on the legs.  I have a lot of clean up do.
Since there is no carving on the rear legs, which are the pad feet I decide to work on those first and get them out of the way.  This is where the hand tools come in, I use a spokeshave to smooth out the bumps and get nice clean curves.  Then carving tools to finish the shape, rasp and files to complete the smoothing.  Then using a card scraper of finish.
When I was working on the leg, I started to think about attaching it to the side and the prototype side that I had cut out.  I realized that I had not done it correctly.  I needed to leave it at 5 inches at the end and cut a curve leading to the edge for the knee block.  So I made a new side for the prototype.  You will see that in the video.
Here is today's video:

Monday, June 16, 2014

Completed a Second Practice Ball and Claw

 I did not leave enough material to carve the upper part of the claws on the first ball and claw, I thought I had better do another to make sure I bandsaw the foot blank correctly.   I modified the template for the leg and left a larger bottom section.
Since I was going to do it again, I have the opportunity to see if I can improve on the last one by making the ball rounder and the talons more life like.
It went much faster this time and I think I got a much better looking foot.  So, on to the real mahogany.
Here is today's video:


Sunday, June 15, 2014

Trip to the M-WTCA in Columbus Ohio

This week the Mid-West Tool Collectors organization held their spring meeting in Columbus, Ohio.   I have always wanted to go to one of the great tool collector events but either I was busy or they were too far away.  I have attended Ohio Tool Collector events but the M-WTCA is the big daddy of tool events.  Now after a 10 year absence from Ohio, the event was only 2 hours from my home.  I would not miss out.
I joined the M-WTCA so I could attend the event, since it is for members only.   I was surprised to find that they have thousands of members and they sent me a current members directory and copies of the last 3 Gristmill publications. Great reading.
I did not have any special tools that I was looking for but took some cash to buy something that I might find I could not live without.  
I drove down on Thursday to the Tailgate Meeting, which is outside in a flea market atmosphere.  All of the tool sellers and traders were set up in the parking lot with their goods on display on tables, trucks and the ground.  It took quite awhile to make it around to all of the set ups.   I did buy a Stanley #3 for Doug Moulder for a real bargain.
This is a good user plane, not one that would be on a shelf to be admired.  Very little clean up to be done.
I did meet up with a few of fellow SAPFM members, Jim Crammond, Andrew Messimer and Ben Brungs.

On Friday, the indoor meeting began at 10am in the main exhibition rooms.  The hall was very large and there were 50 or more tables to explore.  Quite a display.

It took me hours to explore all of the displays.  Here are some interesting
wood braces.

After all of the searching I did snag a couple of items for myself.  A couple of carving chisels, paring chisel, back saw and folding ruler.  There were a number of items I could have purchased but I did control myself.

In all, it was a great experience and I am looking forward to the next tool collector show for some more great finds.

Friday, June 6, 2014

Finished Carving the Practice Newport Ball and Claw

Woodworking the the summer is a lot harder than the winter.  The weather here has been wonderful the last few days, so it has been hard to spend a lot of time in the shop.   I did get a few hours here and there so I finished up the ball and claw that I had started.  I turned out pretty good but I need to do another one to refine my processes.  I will start that in a few days.
So here is the video of the finished foot for now.

Sunday, June 1, 2014

Working on the Newport Ball and Claw Foot

I spent some time yesterday working on refining the Newport ball and claw foot that I had rough carved before we went to Williamsburg.
I undercut the rear claw near the top.  I worked in from both sides of the knuckle with a small #3 but I still could not get it through.  So I used a 1/8 drill to make a hole all the way and then widened it with a chisel.
Then I started to undercut the talons.  I drew an arch on the talon so I had something to follow and then carved away the material.  I used some small files to refine the openings.
These talons seem to be very delicate, I hope that they stay attached until I complete the carving.
So here is today's video:

Saturday, May 31, 2014

A Trip to Colonial Williamsburg

I took a break from woodworking over the Memorial Day weekend. My wife and I went on a road trip to Colonial Williamsburg.  It was our first trip there and we were not disappointed.
We were immersed in american history and of course the 18th century period.
There were several exhibits on the grounds that involved woodworking in the 18th century.  The cabinetmaker's shop had a number of nice pieces as well as demonstrations on the work that they were currently doing.  They are reproducing this highly carved card table.  The original is in the local museum.
We were able to see quite a few 18th century furniture antiques in the various houses and we also visited the Cooper shop where they were making barrels and water buckets.  All with 18th century tools.
They have a Joiner Shop where they were make moldings for the buildings and wooden boxes to hold George Washington's personal things at Yorktown.  Again only using period tools.

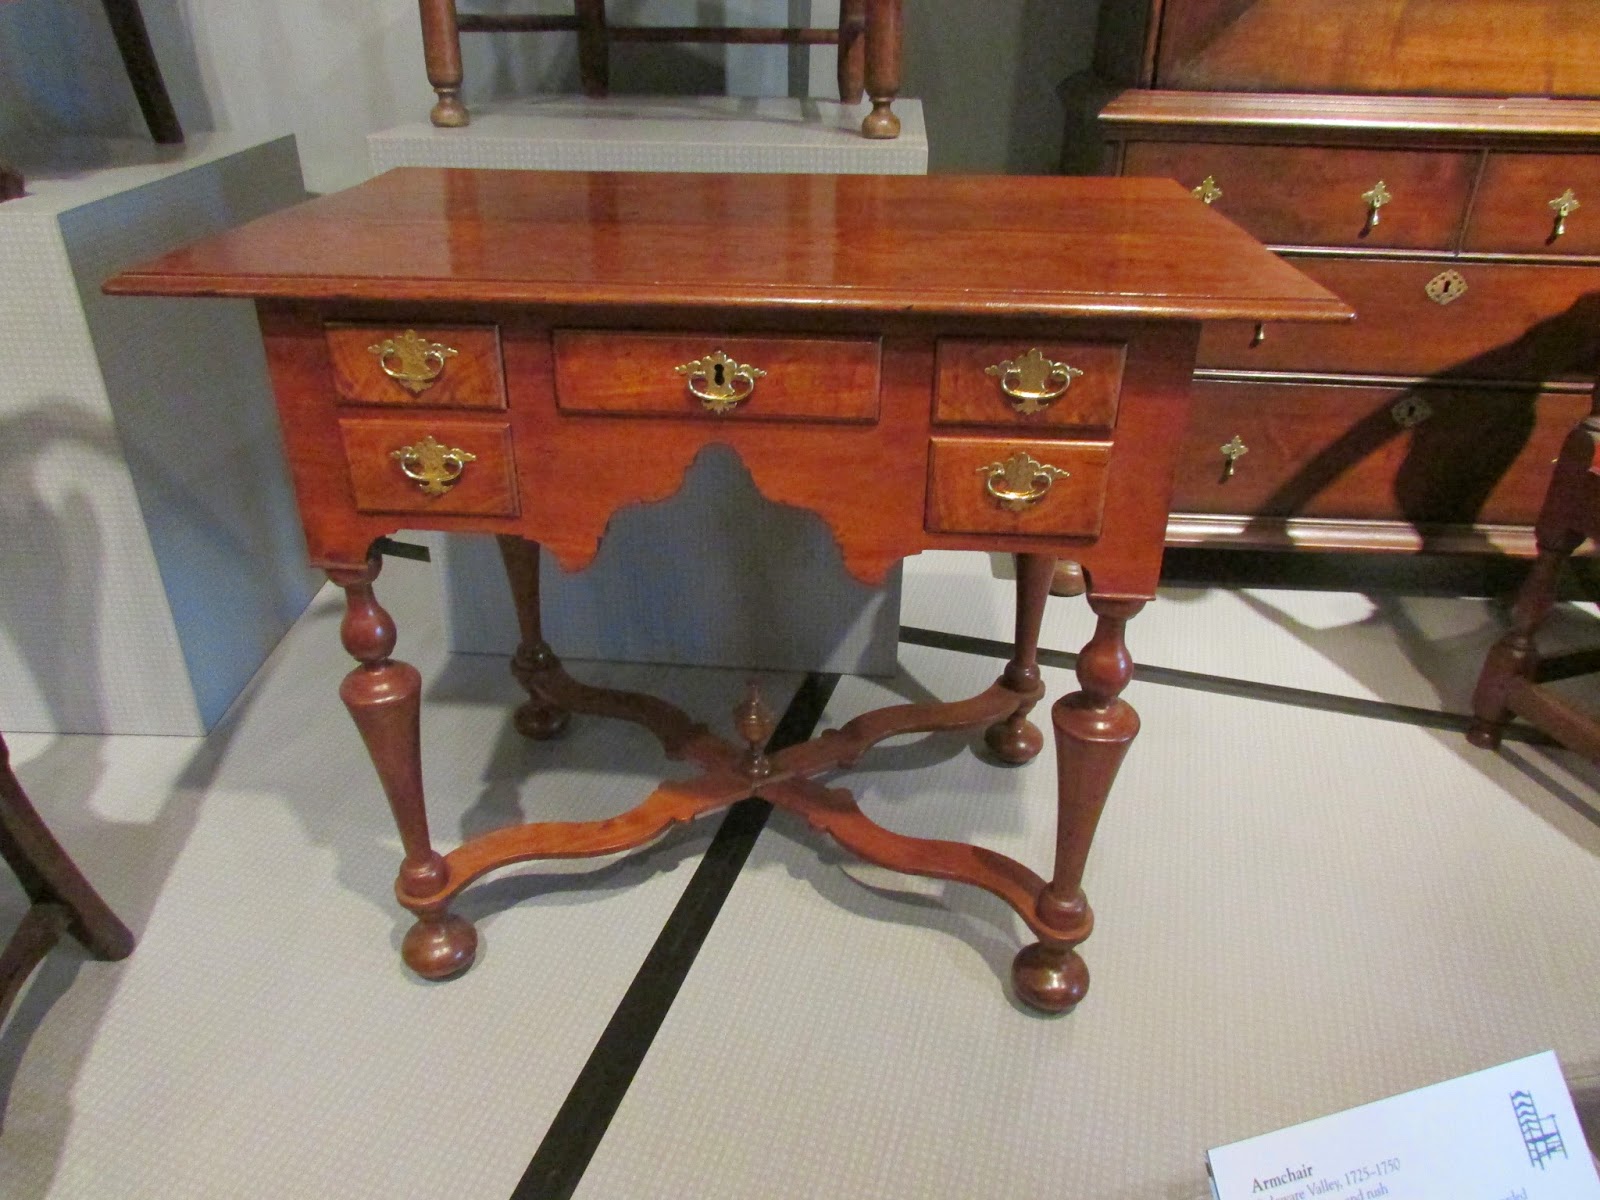
The highlight of the trip was the visit to the museum and a private tour of the furniture exhibit. Southern Fair is the title of the exhibit at the DeWitt Wallace Decorative Arts Museum.  Our guide led us through an 1 1/2 hour study of their southern pieces.  I also spotted some pieces which I am going to add to my list of things to reproduce.  Here are two that I have my eye on:


 And lastly we did a behind the scenes tour at Bruton Heights to visit the studio where they conserve the antique furniture for display in the museum and other houses.  What a treat!

So now that I am back home I will continue to work on the Newport Card Table.

Friday, May 23, 2014

Carving the Practice Newport Ball and Claw Foot

The Townsend Card Table is obviously a Newport piece of furniture. If I were to put a Philadelphia ball and claw foot on the table it would be out of context.   So, I have to carve a Newport ball and claw which I have not done before.   I obtained a plaster cast of a Goddard foot from Al Breed.  He sent me one that had a broken talon, but that didn't matter.  In today's video I take a crack at carving the different style.  I have completed the basic shape in this video, and now will refine the shape in the next video.
It was a lot harder to carve than I thought but like any new thing I went slower that I normally would since I wanted it to be acceptable.
So here is today's video:

A Trip to Irion Lumber - Wood Paradise

Doug Moulder and I made a trip yesterday to Wellsboro, PA.   It is about a 5 hour drive from my house, so having someone along makes the time go by much quicker.   Also, it helps to have someone to hold one end of  the heavy lumber.
I am in search of some good Genuine Mahogany for the Townsend Card Table that I am building.
I have been to Irion Lumber before and I don't know of a place that has a better selection of fine furniture grade lumber.
Myron Yoder, who runs the place for Lou Irion took us up to the top of the hill where they have several sheds full of various sizes of Mahogany.  How about 40" wide 10 foot boards!  He also shows us their private stock selection of some really fine and figured stock.
So, we start to sort through the various sizes of lumber that I need, 4/4 tops, 8/4 sides and 12/4 legs.   While we are doing this mother nature comes along and dumps a thunder shower  with hail on us, so we have to duck under one of the shed roofs for awhile.  Wading through the mud now we pick out the stock.  I land a couple of 20" wide 4/4 boards for the tops...
While I am a little poorer as we leave, I am satisfied that we have some really fine wood to make into the Townsend Card Table.
The wood is in the shop getting accustomed to the humidity and I am going to continue to carve the practice Newport ball and claw foot that I have started.  I post a video when I get a little further along.
It was a good trip!

Monday, May 19, 2014

Completing the Prototype and Reviewing the Dimensions

Today I put together the apron, right side and the leg.  To this I added two 2x2 legs cut from a 2x4.
So the front and side are the actual dimensions.  To this, I cut out one quarter of the top to match the right side and front of the table frame that I had made.
After assembling all of this, it is time to take a look at how all of these elements fit together and look.  Are they pleasing to the eye?  Are they functional, can you sit at the table and get your legs under the apron?
Doug Moulder came over today and reviewed the prototype.  He looked at it from all sides and sat at the table.  He gave it his blessing.  Now I am ready for the next steps.  I am going to carve a sample Newport foot and make a trip to wood heaven "Irion Lumber" to purchase some mahogany.
So here is today's video:

Sunday, May 18, 2014

More Design Work and Cutting Out the Aprons

I went back to the drawing board and worked on the top view of the table.  This accomplished the view and dimensions of the cyma curves which are in the aprons.  It also allowed me to figure out the swing for the rear legs.  I am not sure about the length of the swing legs yet I think they are currently about 11".  I may want them longer, this would add more support for the back half of the top.  The top is 16 3/4" fixed and 16 3/4 swing, this combines to 33 1/2" top. The width of the top is 33 1/2" as well.
Once I completed the drawings, I was able to trace the outline on to poster board which I use for templates.  I have an inter curve and an outer curve for the apron and top respectively.  
I traced the template on to 1 1/2" stock, added 1" tenons which I cut a 45 degree end and bandsawed the shapes.  
Then I mortised the leg and fit it together.  I'll post another video tomorrow after I make the partial top to complete the prototype.
So here is today's video:

Friday, May 16, 2014

Working on the cabriolet leg

The day before yesterday I cut out the sample cabriolet leg on my band saw.  Now it needs to be shaped.  The Newport style of leg is not rounded over like many other cabriolet legs on 18th century furniture.  I begin by removing all the saw marks and bumps using a spokeshave.  It probably my favorite hand tool.  I really like how you can smooth a curved surface with this tool.
When I first started to use a spokeshave I tried old Stanley and other styles and I had limited success at using the tool.  I admit I never tried a wooden one.   Well finally I bit the bullet, spent some money and bought the Lee Valley set.  These are wonderful tools compared to others that I had been using.
Other shaping on the leg that needs to be done that the spokeshave can't do I use a rasp and files to fit the tight curves.
Normally, you mortise the leg before you cut it out, it is easier to do while it is still a rectangle but I didn't.  So now I am going to add the mortises after I figure out what the apron shape will be.
So here is the video: