Anyway the piece I am talking about is in the center of this picture. This is a picture of the chest at Winterthur. There are a number of different designs on the various Chapin chests in other museums.
I am trying to reproduce the Winterthur version of the chest as close as possible. The center piece is made in two parts. The base and capital are two pieces. I need to glue up stock to turn both pieces on the lathe.
While I am turning things I thought I would make the finials as well.
I glued up two pieces of 8/4 cherry stock for the pedestal and capital. The maximum I could make would be 4 inches round. But the actual size is about 3 1/2.
I made a copy of the finial from the full size drawing that I have. It is 1 3/4 inches at it's largest and about 6 inches long. I don't need to glue up stock to turn this piece. Since I am waiting for the glue to dry on the other pieces, I am going to start with the finials.
After a little warm up on turning I turned the first one below. I had made two prior during the warm up that I won't show, that's why it is called the warm up.
Now the trick is to make another like this one. I used the first one as a model and turned the stock as best I could. I am not a good turner so I go slow and try to be careful not to get a catch.
I finally got the slope right and now I am turning the little ball on the top. Then I put the bead on the center. A little sanding while it is on the lathe and I think I have two good finials.
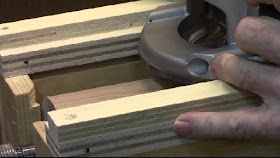
I turned the glued up block to 3 1/2 inches round to get ready to add the flutes or round overs. I have used this box before for putting flutes in quarter columns. I had to modify it slightly by adding 3/4 of an inch to the top so the router bit would clear the bottom. I can lock the drive end of my lathe and then l can fix the turning in the lathe bed so it won't turn, this allows me to use the router to cut the flutes.
I counted the number of flutes on the original to be 12 and at 3/8 of an inch spacing it came out even around the circumference of the stock. I marked the starting point and 3/8 inch spaces on the bottom of the turning.
Then using the router with a point and round over bit, I was able to make passes with the router after locking in the turning.
This what it looked like after about 5 passes. The flutes are a little pointy but I can round them over later.
I routed both sides of the cylinder, so I have 2 of the pedestals that I need. I split them apart where the craft paper is in the center. I cleaned up the flutes with a little sand paper.
I turned two capitals for the top of the pedestal the same way, then split them apart and sawed off the portion that I needed.
I placed the capital on the column in the center and drilled two small blocks of wood to hold the finials. Here we see the pieces in place on the top of the chest. None are these pieces are fastened in place. I am going to wait until I am finished with the drawers before finishing the top.
I am done with this phase of the top, I am going to carve the cartouche last. Now I am going to get started on the drawers.
Here is today's video:


No comments:
Post a Comment