Search This Blog

Friday, June 16, 2017

Curved Blockfront Lowboy Pegs & Drawer Stock & Layout Step 6

I needed to make some cherry pegs for the joints in the case just after I had glued it up.  This is what the old guys did so I decided to follow their example.

Now they used square pegs but I like to use round ones.  I made some with my Lie Nielsen dowel plate.  I cut some 1/4 x 1/4 cherry stock. Then whittled the end to make a point to start into the plate.
I put the square in a drill and pushed it into the dowel plate.  And out come the dowels.


That is one way to make dowels. I like a second way, that is with a block of wood and a blade.  I have seen it done with a chisel. I have an old spokeshave blade that is sharp and screwed to the block of wood just over a 1/4 inch hole. The hole is a little wider at the beginning.  Again it helps if you pare away a little in the beginning of the rod to get it started in the hole.  I put it in an electric drill and push it through the opening.  It works like a pencil sharpener.  It produces nice smooth dowels.


I made some dowels and cut them to 1 1/2 inch pegs.

I drilled 1/4 inch hole through the tenon to 1 1/4 inch deep.  Then I put some glue on one end of the peg and pound it home with a hammer.


After the glue dries I pare off the peg flush and sand it smooth.

Next I start on milling some pine for the drawer sides, back and drawer bottoms.  The back and bottom will be 1/2 inch thick and the sides will be a little over 3/8 inch thick.


The sides and back will be 3 3/4 inches high.

The drawer bottoms will have the grain running side to side across the width of the drawer.  That way the expansion of the bottom goes to the back, rather than to the sides and make the drawers stick.
The drawer bottoms will be 7 3/4 inches by 16 inches.  I need to glue up panels and try to keep them flat with weights.


I rip the sides and backs to the appropriate sizes and pile up the stock to be dovetailed to the fronts.

I start the same way all the time by marking on the inside top of each corner of the drawer, starting on the left front.  So the two corners on the drawer front are i and iv on each corner.  This is so I can keep track of which piece fits into which dovetail.


Once they are marked, then I use the wheel markers to scribe lines for each of the lengths I need for dovetails.  I am going to make 5/8 dovetails in the front, 1/2 inch in the back and 3/8 deep for the sides. Using the wheel markers is real easy.


Once they are scribed, I layout the size of the dovetails.  There are many ways to layout dovetails.  I do it by guess.  I have done this so many times that I kind of know what will work.  If I did not know I would use dividers to come up with a consistent size.  You do have to decide how many dovetails you want to start with.  One this size drawer I usually make 3 or 4 tails.  In this case 3 - 3/4 inch tails and 1/4 inch pins make it come out even.  I usually start with 3/8 inch pin at the top and 1/2 on the bottom for the groove for the drawer bottom.


After marking the spacings I use a sliding bevel to set the slope.  I have it set at 15 degrees. Again this is arbitrary. It looks good to me.

I mark out the tails on the sides and saw them as a pair with the numbers on the inside facing each other.


I saw through the lines on the tails.  I leave the lines on the pins. I saw down to the scribe line. Then I chop out the waste with a chisel.

Here is a detailed video of mine on laying out and cutting dovetails.
Cherry Oxbow Chest Hand Cut Drawer Dovetails Step 11


So that is it for now. The next post will continue with cutting the pins in the drawer fronts and fitting the drawers.

Here is today's video:


Thursday, June 8, 2017

Curved Blockfront Lowboy - Drawer Fronts & Glue Up - Step 5

It is time to concentrate on the curved blockfront drawer faces.  I made a practice one out of maple to see if I remembered all of the steps that are necessary.  I also went back and viewed my own video from the previous build.


This is a link to the video from the prior build where I made the drawer fronts
Curved Blockfront Dressing Table Final Convex Drawer Fronts Step 15

I was satisfied with the preparation I had made, next I needed to select the stock for the drawer fronts.
I have this large 8/4 figured cherry board that should be great for the fronts.  I want the grain to match and there to be interesting figure.


I use my hand planes to flatten one side of the board to expose the grain.  I select about 30 inches of the board for the stock.  I need to plane it to 1 3/4 inches.


I milled six blocks, the grain is continuous and should match the apron.


I mark out the pattern on the top of each of the blocks, I use the top drawer blade as a template  and bandsaw out the curves.  The bandsaw blade broke on the last one so I finished the cut with an old blade that was dull as you can see it burned the wood.


I use my round bottom spokeshave to clean up the bandsaw marks on the curved fronts.


To finish I use my card scraper to get a better finish.


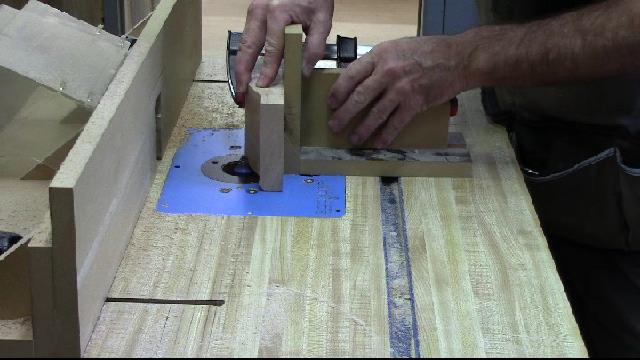
Now that the fronts are smooth, I use two router set up to put the quarter round on the edges of the fronts.


I have to use the above router set up because the corners have been cut by the first pass on the router, if I turn the drawer front on the side and run another pass it will be too deep on the corner.  Routing from the top and registering from the back the second cut depth can be perfect.

Next using the router and a template I route out the majority of the 1/4 inch from the top, creating the lip for the drawer.


I use the table saw to cut out the sides to create the lip on the sides of the drawer front. I check the rough fit for each of the drawers.


I left about 1/16 of an inch for final fitting when I routed out the majority of the wood.


I use chisels and small hand plane to clean up the waste left by the router.


I carve away the remaining checking frequently for a good fit.


All six fitted and cleaned up. I love the grain in the fronts.


Now is the time to glue up the case.  I drilled the 1/2 inch holes in the bottom of the apron for the drop finials.  I sanded the sides and apron to 180.

This is a complex glue up.  I use Old Brown Glue liquid hide glue which has a long open time.
I glued the rear legs to the back, then laid it flat on the table. Then I glued the front legs, apron and drawer blades together to make the front.  Then I glued the sides and the drawer runners to the back.  Everything was sticking straight up off of the table. Then I fit the assembled front to the sides and drawer runners.
Once it was all together I stood it upright and clamped it.


I have to clean up the excess glue and sand a little when it dries.
Next I will work on making the drawers.

Here is today's video:

Sunday, June 4, 2017

Curved Blockfront Lowboy Vertical Dividers & Drawer Runners Step 4

I started to work on the vertical drawer dividers.  I put a 1/2 inch dovetail on the end of a piece of cherry stock that would fit between the top drawer blade and the apron.  To make it fit across the center blade I made a mortise on both the vertical piece as well as the drawer blade. This made it fit flush.


Here I am chopping out the waste from the mortise in the center drawer blade.


I fitted the vertical dividers to the top drawer blade and the apron.  I used my marking knife to trace the shape on them.  Now I have to cut out the dovetail sockets.


I have to make sure that the vertical dividers are square to the opening before marking them with the knife.


Chopping out the dovetail sockets in the top drawer divider and the apron.


As you can see they fit into the dovetail sockets just right.  Now I am starting on the drawer runners.
These are made from poplar.  The horizontal runner is 2 1/4 inch wide and divided into 3rds.  Each 3/4 of an inch.  The vertical drawer guide is 7/8 of an inch set in 1/8 inch dado in the center.


I will need to make mortises front and back to fit the runners. As usual I make a story stick marked where the mortises need to be on the front and back.


I register the story stick on the top for the front mortises.


Then I register the story stick on the back and produce the same markings.


I have to chop out the mortises on the back by hand since the piece is too large for the hollow chisel mortiser.  The front pieces are small enough to fit in the hollow chisel mortiser so that is what I used for the front mortises.


Here they are all dry fitted.  I want to make sure that they are flush with the vertical and horizontal drawer dividers.


The side drawer runners will be nailed and glued to the side after the piece is glued up.


While I had the piece apart I cut out the double ogee on the bottom of the two sides.


I need to drill a couple of 1/2 hole in the bottom of the apron for the drop finials.  But this completes the case build.  I need to sand it to 180 and then glue it up.


Next I will concentrate on the curved drawer fronts.

Here is today's video:

Monday, May 29, 2017

Curved Blockfront Lowboy - Drawer Blades & Apron Step 3

I am starting on the apron and drawer dividers (drawer blades).  The most complicated is the apron since it is curved in two directions. Across the front to create the blocking and across the bottom which mirrors the front curves.

I took the drawing off the wall to make sure I had all of the radiuses correct before marking up the stock. The drawer blades need to match the curves of the apron exactly since the lip of the drawers will be touching each of the curves.


I milled some cherry 3/4 thick by 2 1/2 inches wide by 26 1/4 long plus the tenons.  Then I marked out the curves with the template.  I am going to cut this out fist and use them as a template for the apron.  I have tacked the two together so I can cut out both at the same time.


Here is the pair of them cut out. I used a spindle sander to clean up the saw marks and a chisel to make to blocking curves sharp.


The apron is curved in two directions.  The front and the bottom.  I traced the pattern on the top for the cut out of the front and I drew the curves on the bottom using a compass.
I will cut out the bottom first and then cut out the front. The stock is 2 1/2 inches thick by 4 inches high.


Before I bandsaw out the curves on the apron, I want to put the tenons on the ends while it is still square.  I use my table saw and tenoning jig.


Bandsawing the bottom of the apron.


Now that the bottom is complete, I need to band saw the front curves.


Bandsawing complete. Now I have to clean up all the saw marks.


I use my round bottom spokeshave to clean up most of the marks on the concave and convex curves.


I use a card scraper to clean up the marks that I can not get to with the spokeshave.


I fitted the apron into the mortises that I had cut earlier in the front posts.  This joint will be pegged when I glue up the piece.  It is looking good and I like the grain of the apron.


Next I use spacers to position the lower drawer blade or divider. I have already put dovetails on the end of the cross piece.  Then I use my marking knife to trace the dovetails on to the posts.  These dovetail sockets will go all the way through


In preparation for cutting out the through dovetail socket I use a marking knife and bench chisel to create a shoulder or groove for the saw to follow to keep it straight.  Then I cut it out with my dovetail saw.


I use a bench chisel to clean out the material between the saw grooves.


Lastly, I use a hand routing plane to flatten the bottom of the dovetail socket.in the post.


Next I cut a dovetail on the top drawer blade and use my marking knife to trace it on the top of the post.  The size of the dovetail was arbitrary but it looks good.


I cut out the dovetail socket like any other half blind dovetail


After sawing it out, I chopped out the waste.


There are the two drawer blades fitted to the posts. If you are careful when you mark out and saw the dovetails they should slide right in, sometimes it takes a little paring.

With those dovetails in the posts and the apron pegged, I don't think it is going to come apart anytime soon.


In the next post I will work on the vertical drawer dividers and drawer runners.

Here is today's video: