Search This Blog

Wednesday, July 18, 2018

Pennsylvania Chippendale Slant Front Desk - Making Fluted Quarter Columns - Step 3

I am turning my attention to making the fluted quarter columns for the desk.  I need to do this because the top or capital of the quarter column runs into the slope of the desk lid.  I can't cut the slope until I make the quarter columns.

Here is a picture of the capital turned on a practice piece with one that has been cut to the slope below it on the table.


I used the cut offs from the sides of the desk to help match the grain, I added a 7/16 inch strip to make the 1 1/4 inch square stock.  I have not done this before so we will see how it works out.  If not I have two on the other side.


I prepare the stock by gluing up four pieces of 1 1/4 inch cherry and placing craft paper between the joints.  I use hide glue to hold it together.


Now I have turn the base and capitals. I start by turning a square edge pummel and then turn the end round.  Then I lay out the pattern and turn the shapes.


The design is not too complicated. Cove and bead with a few flats. Need to check the diameter from time to time.


Turned the capital on this end, now I need to turn the base on the other.


I will look something like this once I get the fluted quarter column made.


I have used this box on top of the lathe a number of times in earlier posts for fluting the glued up column.  At this point I have turned the column round and to the diameter that I want.


Then I use my router with a 3/16 inch straight bit to make the flute.  I have marked the edges of the cylinder where I want the flutes so they come out even.


Here is one quarter of the cylinder completed with the router.  I will later finish the flutes with a scratch stock.


This is a scratch stock I have used before to make the flutes in quarter columns. It rounds the bottom of the flutes.


Here are all three together. I have only split apart the top capital.


The quarter columns will need to be cut to length  but I'll do that later when I install them.


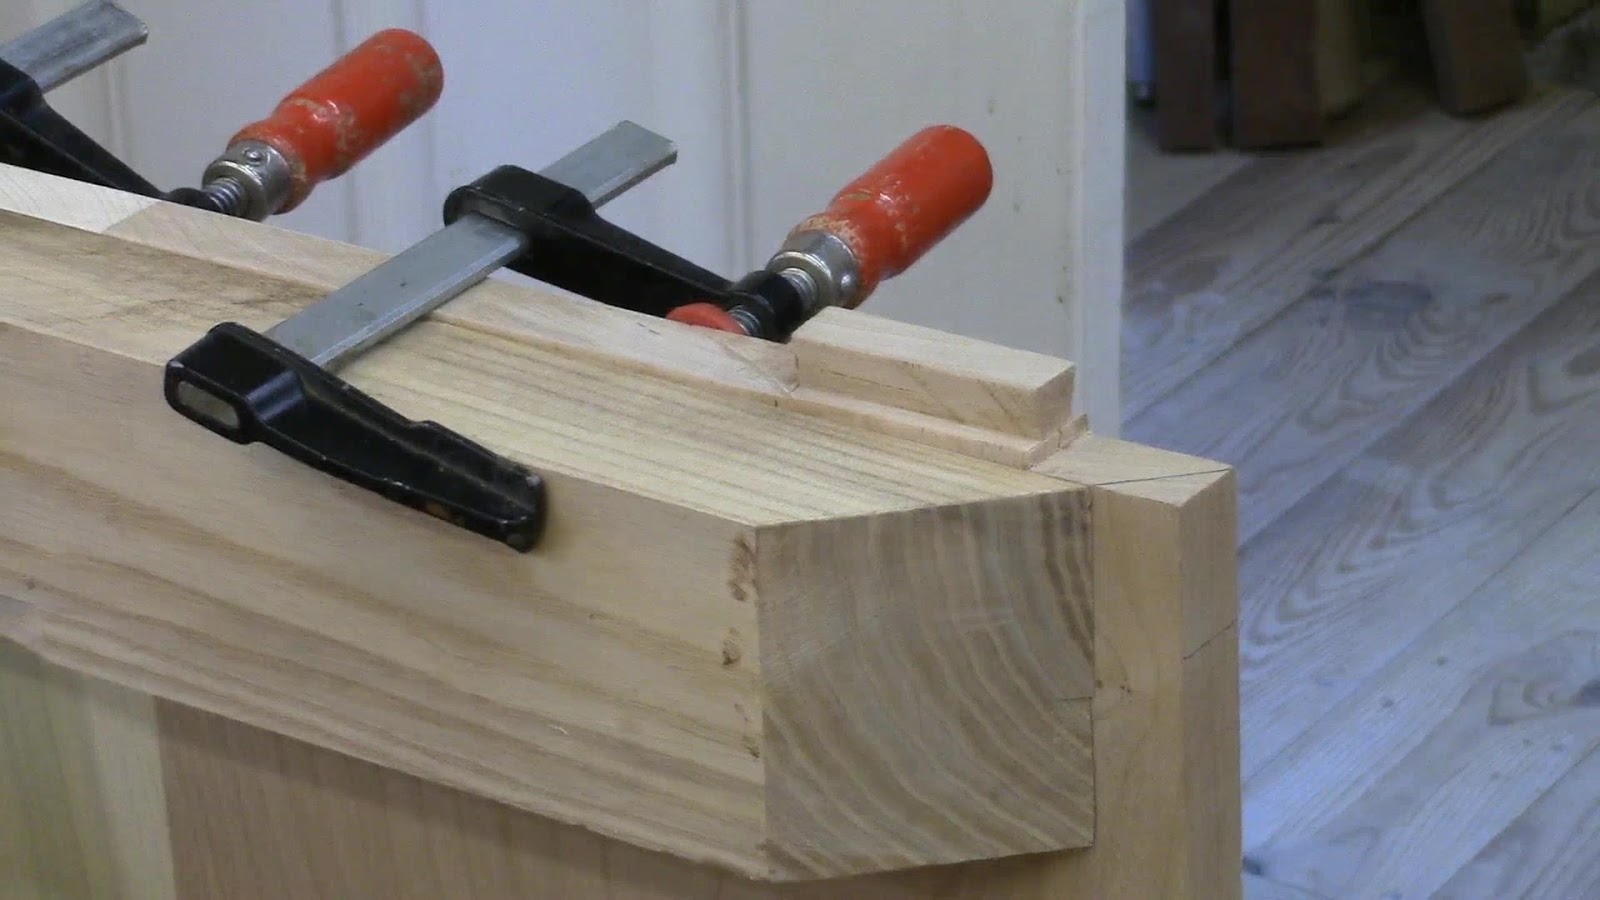
The capital has a special joint that needs to fit under the writing surface. I will show how I made this in the next post and video.  You can see the line above the joint near my thumb where it will be cut as part of the slant front.


Here is today's video:

Friday, July 13, 2018

Pennsylvania Chippendale Slant Front Desk - Making the Case Step 2

Now that I have the plans and built the prototype, it is time to get started on the actual piece.
I have some cherry stock from Irion Lumber left over from building the Chapin highboy a couple of years ago.  I am going to use poplar as a secondary wood for the desk.

I start by flattening the boards with hand planes since I do not have a jointer wider than 8 inches.  These boards are 13 inches wide.  I am going to need to glue them up because I need 19 1/2 inches for the sides.

After I get one side flat I can flatten the other side by running it through the planner or drum sander.


Here is the poplar bottom glued up and the cherry top is sitting on the saw top.


Here are the two sides getting glued up.  I use the weights to help keep things flat until the glue dries.
I use the wax paper on the board so the metal on the weights doesn't leave stains on the wood.


Next,  lots of dovetails to cut. The size of the dovetails doesn't matter too much, these are 1 3/4 inch tails and 1/4 inch pins.  They are on the bottom and not seen.


Once the dovetails are cut I layout the dados for the drawer dividers and writing surface using my story stick.


I have the top, bottom and two sides dovetailed so I do a dry fit to see that everything goes together.


I cut the dados and dovetail sockets in the sides using a router with a guide and the dovetails on the end of the drawer dividers using a dovetail bit and the router table.


I have to cut out the  1 1/4 inch from the corners plus 13/16 for a vertical divider to allow for the quarter columns that I want to put in this piece.


I dry fit all of the drawer dividers and writing surface, you can see the open corners for the quarter columns.


Now I have to put a 45 degree miter on the under side of the writing surface to allow the vertical divider a mitered fit.


I use a guide block to help cut the 45 degree miter on the front edge.


The vertical divider need to have a matching 45 on it as well, so I use the guide block to help with this cut.


Dry fitting the vertical divider, hope is doesn't need too much adjustment.


Looks like a good fit for now.


I'll put screws and glue to hold it in place when I do the glue up of the case. The quarter column will be glued in this space also.


Next I will make the top of the quarter column and the extension to fill the area above the writing surface before I cut the slope for the desk front.  That is will be in the next post.

Here is today's video:

Friday, June 29, 2018

Pennsylvania Chippendale Slant Front Desk - Plans and Prototype Step 1

I am starting a new project. A Pennsylvania Chippendale Slant Front Desk that I picked out of some pictures that I found on the internet.  This is not a reproduction of a specific piece that I found in a museum. 


I don't have the dimensions of this desk so I will pick my own.  Most of these desks are slightly higher than they are wide.  This one is going to be 40 W x 19 1/2 D x 42 H.


I started by making full size drawings of the desk.  I'll make a story stick later from the drawings that I will use as I build the piece.

For the inside of the desk or gallery I am going to use an article by Lonnie Byrd from Fine Woodworking 2002 as a pattern.  I really like how it looks.


The joinery around the lid and the quarter columns is a bit complicated so I decided to build a prototype.


I had some soft maple laying around the shop so I used it to build this small prototype.  The depth of the prototype is 19 1/2 like the full size piece but the width is obviously narrower.


Here is where the joinery gets a little tricky.  The quarter columns need a 1 1/4 inch recess, so to create it you cut back the side and the front. Then put a 45 degree miter on the writing surface.  The vertical divider has a matching 45 miter to hide the joint.


This makes the first divider, you can see the 1 1/4 x 1 1/4 recess on the corner for the quarter column and second one would be tenoned to the right to create a space for the lopper or lid support.


Here is a sample of the quarter column.


Now the most complicated piece.


It has a turning of the capital for the quarter column and the balance of the 1 1/4 slope that is needed for the desk side.


It fits in here.


This piece is made by gluing together 4 - 1 1/4 in pieces with craft paper between.


Here are the way they looked when glued together.


Then I placed it on the side and cut off the excess to match the slope of the desk.


There you have it.  I think I now know how I am going to do the joinery.  So I'll get started my making my story stick and milling the wood for the sides and top.


Here is today video:

Saturday, May 12, 2018

Townsend Kneehole Bureau Finishing Process & Complete Step 13

Now that the construction is complete, it is time to think about how I want the finished piece to look.
I usually have an idea in my head about how it should look.  I often get these ideas from pictures in books or from museums.

The finish usually includes dye staining the color.   In this case, I am trying to make it look a reddish brown like old leather.

I cut a piece of wood from the mahogany that I used for a sample. The samples need to be finished just as I would the entire piece.

The routine that I used was to sand the mahogany to 180 grit.  Then I wiped the wood with warm water to raise the grain.  After it dried I sanded it with a gray scotch brite pad to knock the fuzzies off. Wiped off the dust and then sprayed a 1/2 pound cut of shellac on the whole piece.  If you cut Zinsser sanding sealer by 50% you get a 1/2 pound cut.

After drying I sanding again with a gray  scotch brite pad to get it smooth.

Now I applied a water based aniline dye from  Lockwood English Brown Mahogany and some Scarlet Red to the color that I want.  As the dye was drying, I used a wet cloth to lighten the areas that were too dark.  Particularly the end grain.

After the dye was dry I rubbed the surface with a white scotch brite pad.

Now it is ready for final finishing.  Mahogany is an open grain wood and often filled before applying finish.  I do not like the look of a filled finish so I use the shellac to partially fill the grain.

Below are samples of the color that I like with 2 coats of 2 lb. cut  shellac sprayed on.


I tried many mixes of colors before settling on the color mix that I like.


Following the procedure above, you can see that  I have applied the dye and sprayed the first coat of 2lb. cut of blonde shellac.


After each coat is sprayed, I sanded the surface with 400 grit sand paper.  This levels the surface and partially fill the grain.  I do not sand the carving, I use the gray scotch brite pad on the carving.

I repeat the process of spraying and sanding until I get the amount of grain filling that I want.  In this case I sprayed 5 coats of 2lb. cut.

Then it was ready for final finishing.

I wet sand with 600 grit sand paper with mineral spirits an then wipe off the residual.  I wet sand until the finish is very smooth.  I have to be very careful not to sand through to the color.

 
After the wet sanding I apply a good paste wax with 0000 steel wool and wax and then buff to the sheen that I am looking for.


It is a lot of work but this is the result. I finish does shine but there is a glow to the surface.  It does not look plastic.


This completes the project.  On to the next.

Here is today's video: