Search This Blog

Friday, July 28, 2017

Curved Blockfront Lowboy - Finishing Step 11

This is an abbreviated post about what I did to finish the lowboy.  Most of the time was spent mixing dye to find a color that I liked.  This takes quite a bit of time.  I sand samples to 180 grit, then spray with 1/2 pound cut of shellac as a sealer.  Then spray the dye color, rub it out. Then spray with shellac.

Then I don't like the color and start all over. Eventually I find something that I like, and my wife does the checking.

Once I have the dye mix, I am ready to go on the piece.

I sand using an orbital sander on the flat surfaces and by hand on the curved surfaces.
I usually sand to 180 grit, going further to 220 or 320 seems to fine to take the dye properly.


 I have sanded the piece to 180 grit and use a tack rag to remove the dust. I masked all of the parts that I don't want to get finish on.

The first step is to put 1/2 lb cut of shellac on the cherry as a sealer to help keep the dye even.  This also helps keep the endgrain from getting too dark.

Once the 1/2 lb cut shellac is dry, I sand lightly with 320/400 grit sand paper to remove the fuzzy feeling left behind.  Then I use a tack rag to remove the dust.

Now I am ready to spray an alcohol based dye.  I am using a mix of Behlan and Lockwood dyes to get the desired color.

I have an inexpensive HVLP sprayer from Earlex HV5500. With 1.0 mm tip.  The dye with alcohol is a very thin product.

I use a light application so that I can apply it to get the color I want and get it even. I am wearing a mask and hearing protection.


After the dye has dried I rub it out with a 3m Scotchbright gray color pad.  This makes it smooth and even.


Then I applied one coat of Boiled Linseed Oil.  Left it on for 5 to 10 minutes and them wiped it off.
This helped emphasize the grain.  I waited a day before the next step.


Spraying the 2lb cut of Blonde Shellac with a 1.5 mm needle tip. This mixture is thicker than the dye.
I use a 400 grit sandpaper between coats to keep it smooth.  I sand very lightly.  I usually apply 3 or 4 coats.


After the last coat of shellac, I use the gray Scotchbright pad to knockoff the shine.  And then apply a paste wax for the final shine.

Then I remount the hardware.

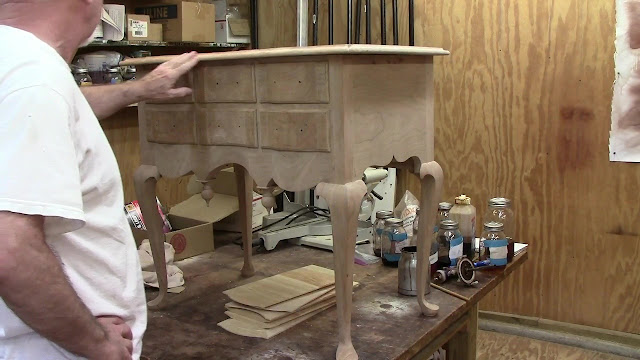
Here it is all finished.


The shop lights are somewhat deceiving to the camera, here is a picture in natural sun light. It will darken with age.


Here is today's video:

Tuesday, July 11, 2017

Curved Blockfront Lowboy Routing the Top & Carving Step 10

The next step in the process was to cut out the curves on the top to match the curves of the drawer fronts.  I used an extra drawer blade as a template to trace the curves.


I have an ogee bit which can put the edge on the top that I need. It takes 3 passes with the router as I raise the bit a little each time.  After that I put a 1/4 inch round over on the bottom to meet the ogee from the top.


Now I need to carve the four corners of the top with what I call the baby butt corner, some people call them notched corners.   I have carved this shape before but I thought I would carve a practice one to re-familiarize myself with the shape.

Below is the practice one sitting on the top.  I have marked out the design on the bottom of the lowboy top.  This is a 3/8 inch radius on either side set 1 inch back.


I need to turn it over and put the 1/4 inch radius circles on the top.


I cut out the 3/8 radius circles on the bottom with a saber or jig saw.  I need to set in the top circles with my carving chisels, I use a number 5.  And then start to carve the shape.


I start by making a groove down the center and extending the cove at the top of the ogee into the valley created by the groove.


I am using a 1/2 inch #3 to round over the lower portion of the ogee.


Here I am continuing to round over the lower portion of the ogee.


I have turned over the top and am extending the 1/4 round over which is on the bottom into the 3/8 inch radius curve.


This doesn't take too long but you have to watch the direction of the grain so that is does not chip off.


I have the shape that I want so all there is to do is clean up the rough chisel marks.  I am using a fine almond shaped file here to smooth over the corners.  I will sand to 180 later when I do the rest of the lowboy.


One done and 3 to go.

There is a detail video on the carving here:Curved Blockfront Dressing Table Carving Baby Butt Corner Step 25


Well, I have completed all four and positioned the top on the case.  I need to mark where the screws will go and drill the holes.  Then take it off to prepare for finishing.


The construction is complete.  Unfortunately there is nothing left to do but sand and finishing.

These are the tasks for me that are not too much fun.  But I have to do them next.


Here is today's video:

Friday, June 30, 2017

Curved Blockfront Lowboy Milling Top & Mounting Hardware Step 9

Time to start thinking about the top of the lowboy.  It is 21 3/4 inches deep by 33 1/2 wide.  I don't have cherry stock that wide so I'll have to glue up a few boards to get the width.
I have an 8/4 board that is 11 1/2 inches wide, if I resaw and glue it up it will be wide enough.


I need to use my large bandsaw for this task, it has 12 inch clearance under the blade guides. I milled 2 sides and 1 edge flat before resawing. This way I would have one side flat on each board after resaw.  I made sure that my fence was perpendicular to the saw table as well as the blade.  I have a 3/4 inch blade on the saw.


The resaw came out just fine with nearly 1 inch on both boards. I match the grain the way I want. I milled the boards to 7/8 and then joint the edges and glue up the panel.  After the glue up I flattened and sanded the panel to 13/16.


I use my crosscut sled on the table saw to square up the top. The top just fits in my crosscut sled which is 22 inches wide.


I use a left over drawer blade as a template for the curves on the front of the lowboy top.  I just traced a pencil line for the cut out.


I used a jig or sabre saw to cut out the pattern. The cut needs to be cleaned up with a spokeshave, files and sand paper before I put the edge on the top.

I get that in the next post and video.


Meanwhile, I decided to work on mounting the hardware on the drawer fronts.
I am using classic brass hardware from Ball & Ball Hardware.  The backplate is nice and flat but we need it curved to fit the drawer fronts.  In addition, it has to be curved in two different directions, concave and convex.


I have a wooden form with a smaller radius than the drawer fronts.  I can strap the brass to the form and when it is removed it springs back slightly.


I use strap clamps to bend and hold the backplate to the form.  I use a deadblow hammer to help the brass to fit the wooden form.


The bent backplate fits on the drawer front well. Now I have to bend the bail to fit the curve and drill the holes for the posts at a 15 degree angle.  I got the angle from my old video when I made this lowboy before.


I use the same technique for bending the bail, I use the strap clamp of hold it in place and then hit it with the deadblow hammer of bend it to the form.


I used my drill press with a jig set to 15 degrees, just a piece of scrap wood screwed to the face of a box on the drill press.


This allows me to rest the drawer on the jig at the correct angle for drilling.  I decided to drill a practice drawer front first.


Drilling the practice drawer front.


The holes worked out very well, the posts are at the correct angle and the bale fits right in the posts. So we are good to go with the drawers.


Bending a bail for the drawer front.


Looks good, the concave drawer fronts were completed by bending the backplate in the opposite direction on the same form.  I did change the angle of the drill jig to the opposite direction to drill the holes for the posts.


Got all of the hardware mounted and placed the top on.  It looks good.  I have to take the hardware off to do the sanding and finishing.


The next steps will be to put the edge on the top and carved the corners.  That will be in the next post and video.

Here is today's video:

Tuesday, June 27, 2017

Curved Blockfront Lowboy Kneeblocks & Finials Step 8

Today I started working on the knee blocks.   I had cut off 2 inches from the top of each leg stock before creating the cabriolet legs. I numbered them so I would know which belonged to each leg.

If  I am careful I will orient the grain to match the knees on the legs.


I made a cardboard template of what I think the knee block should look like and test fit the area.


I traced the shape on the block of wood and cut it out on the bandsaw.


At this point it needs to be shaped.


I put a screw in the back of the knee block so I can clamp it in the vise. 


I am using a Nickelson #50 rasp to take off the extra material and shape the knee block. I use files to smooth out the rasps marks later.


This is a pretty good shape and grain match.


I cut out and glued on all of the knee blocks. I only apply glue to the side of the knee block that touches the knee.  Not to the back of the knee block, that allows the wood behind it to move freely.
I left them a little proud so they can be pared off flush when the glue dries.


I use a sharp paring chisel to trim off the excess and a file to remove the excess on the bottom curve inside the knee.


The one on the right side of the knee is complete.  I like how the grain matches.


I started to work in the finials.  I did not shoot any new video of the turning of the finials but there is a video from the last time I made this piece here. Curved Blockfront Dressing Table Drop Finials Step 23  Here is a couple of shots from that video.


These finials came out a little better than the last time since I was able to turn the little ball on the end as one piece.  The last time I turned the little ball separate and glued it on. 


They also need what I call a washer which goes between the apron and the finial to create a transition from one to the other.
There it is all complete. I will glue in the finials just before I start the finishing of the piece.


Next post will be the top and the hardware.

Here is today's video: