Search This Blog

Friday, January 27, 2017

Chapin HighChest Sanding Finishing & Complete - Step 20

I mounted the cartouche on top and then began to mount the hardware.  I purchased the hardware early in the project from Optimum Brasses in the UK.  They had brass hardware which was very close to the original hardware on the highboy that is located at Winterthur.

I mount the hardware before final sanding of the piece because it allows me to fix things that might go wrong in the drilling and pounding process.


Next is sanding, sanding and sanding.  I am using a 5 inch orbital sander from years ago.  Works for me.  I had sanded to 120 before I put things together, now 150 and 180 grit.  Sander works well for large flat areas. But I have to hand sand all of the curved parts.


No machines here, I have to hand sand all of the little detail in the pediment and cartouche.  Very tedious process.


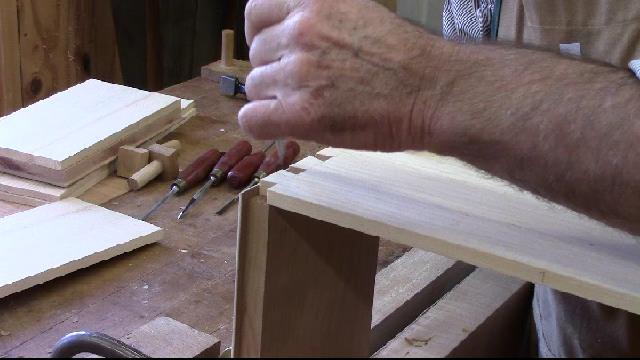
Now I have to make two mortises for locks.  The original chest only had 2 locks installed, so that is what I am doing.  I purchased the locks from Horton Brasses. I made a template and marked it out on the inside of the drawer.  Then I used my hand router to cut out the mortise and recess for the lock.


Here is where I spent most of my time for the last 2 weeks.  Finding the color that I wanted to put on the chest.  I must have tried a dozen different formulas until I settled on a non-grain raising dye from Behlen mixed with a similar dye from Lockwood.  Finally, got what I wanted and I am going to spray the alcohol base dye.


Using an Earlex HVLP gun to apply the dye stain, trying to get an even color on everything.  It dries almost immediately.  You would not want to wipe on stain or dye on cherry.  It can be done but you would have to put a blocker or pre-coat on first.

After it dried, I rubbed it out with white scotch pads to get the surface smooth, even though it is non-grain raising it still needs to be rubbed out.


After I rubbed it out, I was ready to spray shellac.  Usually, I finish with Waterlox but with winter my furnace is blowing hot air and dust around all the time which would be terrible with the slow drying Waterlox.  So I decided to spray blonde shellac, it dries almost immediately.

I still needed to sand off the dust numbs, overspray and orange peel.  I should spray more often, then I would improve my skills.

Here I am using 400 grit sand paper to scuff sand the shellac before the next coat.


I sprayed four coats of a 2lb cut of blonde shellac.  I let it dry for a couple of days before final rub out.

I rubbed out the chest with a gray scotch bright pad and dark wax.  I used dark wax because I did not want little white specks to show up.  Plain paste wax will leave white specks in cracks when it dries on a dark finish.


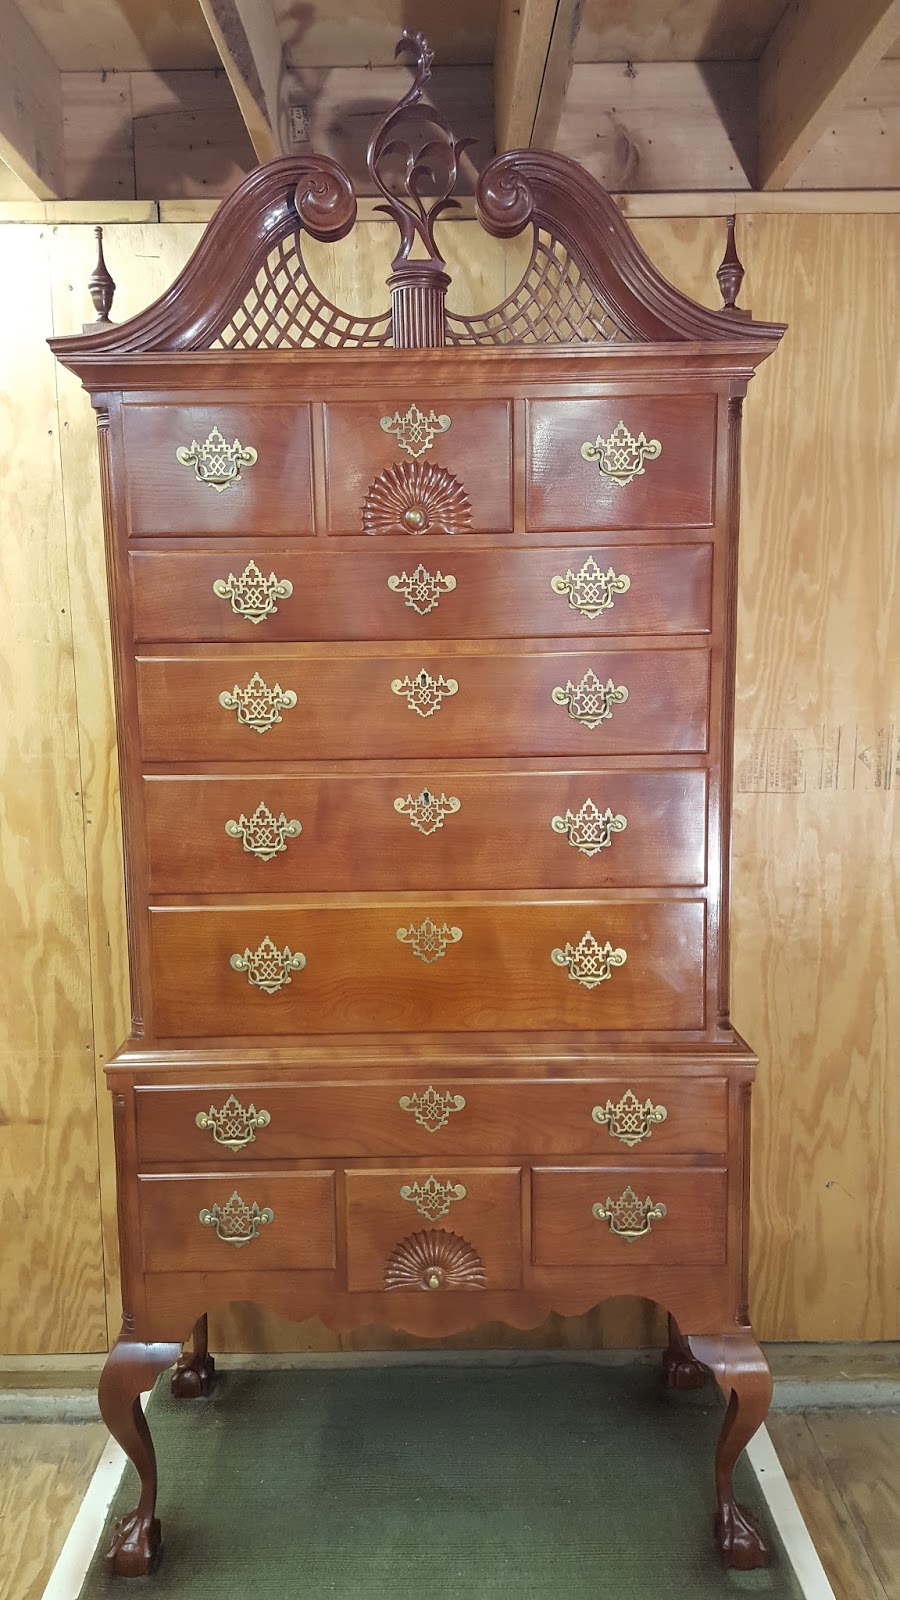
Here is the completed chest.  It was a bit of work but I learned a lot and stretched my ability.


Here is today's video:

Saturday, December 31, 2016

Chapin HighChest Carving the Cartouche - Step 19

One last construction detail remains before I start sanding and finishing. Carving the cartouche.
I have not carved one before and this one is not too complicated. However, it is very delicate.

I have some picture of the cartouche from Winterthur and Yale.  The Winterthur cartouche is an original but the one from Yale was reproduced in the 1960's.  I can understand why because they are very fragile carvings.

Below are several pictures of the front of the carving.  I enlarged the pictures to the actual size which is about 12 x 6 inches and the carving is 1/2 inch thick.  I was able to measure and study it when I was at Yale in June.


I traced the picture on a piece of 1/2 straight grained cherry with carbon paper.


Now I need to cut it out with the band saw and scroll saw.  I used the band saw for the outside and the scroll saw for the inside.

If you watch the video all you will see of me cutting out the inside with the scroll saw is the camera jumping up and down.  I got this old scroll saw from a high school shop.


Here it is after I have cut it out.  I left 1/64 around the lines so I had some clean up to do with the spindle sander and files.


I attached it to my carving board with double backed tape, but there was not enough surface to make it stick well, so I ended up using the small clamps.

Below you can see that I have started to carve from the top and to the first circle.  One problem I had was not having a 3d model to look at while carving.  I don't remember all the details from the visit to Yale.  I decided to carve 3/8 of an inch on the face and then undercut the back to make the carving look thinner than it is and leave sharp edges on the inside.

If you look closely below I have  carved the inside curve of the top of the large circle but the remaining portion underneath is still there, I have not undercut the circle yet.  Later you will see what it looks like after it is undercut.


Below I am carving the cove in the inside of one of the leaves.  Because most of the shapes on the cartouche are near circles, the carver has to be very aware of the grain changes.  Each quarter of a circle the grain changes direction and where they meet is always a problem.

Again you can see the line marked on the bottom where I am going to stop carving on the front and then undercut from the back later. I am using a 1/2 #5 here and I used #5's and #3's on most of the carving.


Below I am carving the inside of the next curve, again I have to watch how the grain changes as I go around the circle.  Carving left and right handed is a must for this carving.


It is coming along here, the picture is a little fuzzy, but the carving is smooth, the small curve in the middle was difficult because it seemed that the grain was always changing.

 I am using a #5 fishtail  here which worked well for most of the carving.


I am studying a smaller picture of the cartouche so I can see detail that is lost in the larger blow up.  I lighting is better on this photo where the shadows and highlights show the curves.


Here is a picture of the back of the cartouche I have undercut all of the curves from the back to make the sharp edges on the front.


Below  is the finished cartouche, it is a little hard to see but the edges are nice and sharp. After all the carving the piece has very little weight to it and is fragile.  Hope I don't break it before I get it mounted.


Got around to mounting it today.


This completes the construction, I need to finish mounting the hardware, then take it off.  Next is sanding and finishing.

Here is today's video:

Saturday, December 24, 2016

Chapin HighChest Carving the Shells - Step 18

Since the drawers are made, it is time to carve the shells that are on the front of the two center drawers.
These are not overly challenging but need to be carved carefully. Because of the half circle the grain is changing all the time as you move around to circle.

I took pictures and measured the size of the shells on the original chest when I was at Yale Furniture Study.
BTW anyone can go to the Yale Furniture Study, all you need is an appointment.  If you want to study period furniture it is the place to go. Contact me if you want information on how to set up an appointment.


Full disclosure, I carved a practise one first.  I did a shell like this one 6 years ago but it is always good to do a warm up.


Using the information that I have I laid out the shell on the drawer front.  I used a compass, dividers and circle template for the layout. I fastened the drawer front to a board using double back tape.


First step in carving was to hollow out the recesses. I used a 1 inch #5 gouge on the large recess.


Checking the depth with a cardboard template.  It should be a consistent 1/4 inch deep all the way around.


The second recess is judged by the depth of the small circle for the knob, it should be about a 1/4 inch deep. Then I rounded over the mound. 

I use the nail as a guide to retrace the lines for the rays.


I am using a v chisel to start the grooves between the rays.  Trying to keep them very straight 


Working back and forth to follow the grain on each side of the groove I am using  #5 gouges of various sizes to round over and deepen the rays.


You have to be very careful when you get to the middle because the grain is straight across and will chip out very easily.


Finished carving all the rays and rounded over the center circle. If you chip out a small piece while carving you can use super glue to put the piece back in.


Cleaned up the bumps with a file and sand paper.


All done with the two shells.  They look good on the chest.


Next step is to carve the cartouche.

Here is today's video:

Monday, December 12, 2016

Chapin HighChest Making the Drawers - Step 17

I have finally decided it is time to start on the 11 drawers that I have to make for the chest.  Two of them need to be carved with a shell.

This is a half-size drawing of the chest, the top center and lower center drawer are the ones that have to be carved.


I wanted the grain to match as good as possible so I tried to get all of the drawers out of one board.
I selected the best board I had for the process. This board is over 10 feet long and 17 inches wide but I couldn't get all of the drawer fronts from this board.  So I opted to get the top drawer fronts from this board.


And the lower drawer fronts from this board. The color and grain should match pretty well since all of the boards came from the same tree.


I milled the stock to 7/8 inches thick and put a 3/16 lip on top and sides of the fronts with a dado set on the table saw.  Then with a router I put a 1/4 inch roundover on the drawer faces.
Below I have fitted the drawer faces to the lower chest.


Now for the upper chest. The grain looks good on all of them.


Now that I have all of the drawer fronts fitted to the openings, I need to mill a lot of pine for the sides and back.  The sides will be 3/8 thick and the backs 1/2.  These are the dimensions of the original chest.

I resawed 4/4 pine for the sides and 5/4 stock for the backs of the drawers.

Makes quite a pile of lumber for all 11 drawers and about a zillion dovetails to cut.


Below is a picture of one of the drawers on the original chest.  I am going to follow this pattern for mine.


Laying out the tails on the sides of the drawers. I keep the top pin, bottom half tail and pin sizes the same on all the drawers but I very the size of the tails to evenly fit on each drawer size.


Saw on the line with my dovetail saw. There is a line made with a marking gage on the depth so I know where to stop which is 1/2 inch.


Then I chop out the waste with a bench chisel. These are half round chisels from Ashley Iles.  My favorite for chopping small dovetails.


Now I match the tails to the sides of the drawer front  and mark them out  with a fine pencil.


Sawing out the pins is a little more difficult, since there is a lip on the drawer and they are half blind you can not saw through the board.   You have to tilt the saw at a steep angle and saw down into the drawer front.  This is normal and can be seen on all hand made dovetails in the 18th century. 
I always saw on the waste side of the line and leave the line on the board.


After chopping out the waste like the tails boards, I can fit the sides to the front. If I do it careful they should fit right in.


Good snug fit.


Now to assemble the drawer. Too tall to assemble on the bench, I am tapping them together with a deadblow hammer.


All of the drawer sides and backs are made.  Now I have to mill a lot of pine to about 1/2 inch for the drawer bottoms.  I need to put a groove on the inside of the drawers so I can slip in the bottoms in and glue them up.  Final fitting will be done after they are glued up.


You may notice that I finally got around to gluing the lattice to the goose neck molding in this picture. 
So now I am going to  work on the bottoms and then the carving on to 2 drawer fronts.

Here is today's video: